|
Java GUI入门手册:
AWT是基本的GUI设计工具,重点学习其中的布局格式以及事件监听事件。
首先创建一个窗口,我们先分析Frame类中的方法:
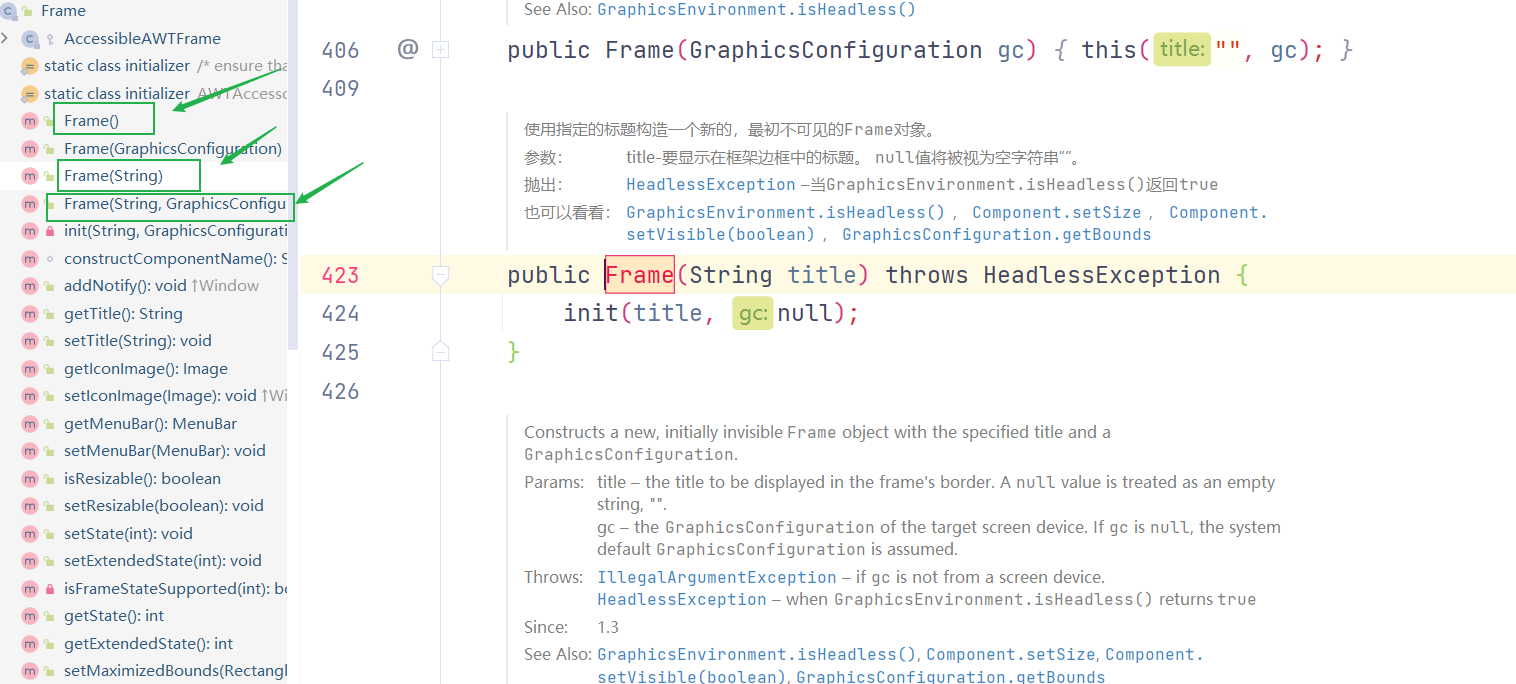
通过上图,可以看出frame是由构造方法的重载;可以选择的设置窗口的标题;
为了让一个基本的窗口显示,我们需要设置窗口的可见性;必须
为了美观,我们设置:
窗口大小
窗口颜色
生成窗口的初始位置在左上角,可以设置初始的弹出位置
创建窗口:
import java.awt.*;
public class TestFrame {
public static void main(String[] args) {
//窗口
Frame frame = new Frame("我的第一个Java图形化窗口");
//设置可见性
frame.setVisible(true);
//设置窗口大小
frame.setSize(400,300);
//设置颜色
//frame.setBackground(Color.BLACK);
frame.setBackground(new Color(57, 198, 26));
//弹出得初始化位置
frame.setLocation(200,300);
//设置大小固定
frame.setResizable(false);
}
}
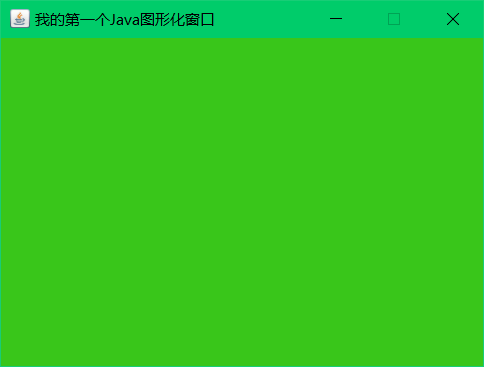
问题:当我们在完成上述操作后,会出现一个窗口,但是我们无法手动关闭窗口,即点击右边的X是没有用的;
当我们完成单个窗口的实现后,回想一些骚操作!
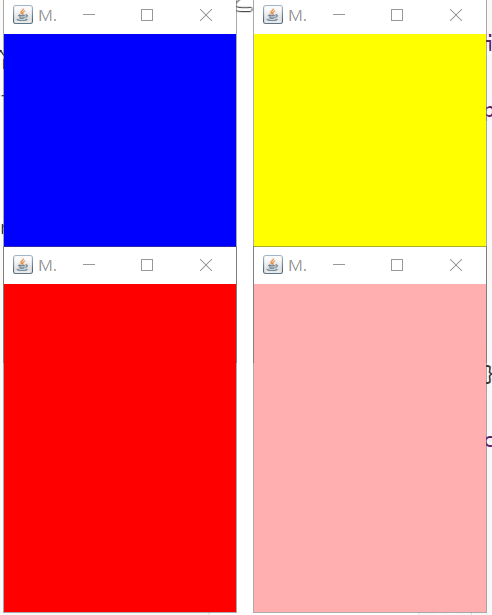
设置多个窗口:
import java.awt.*;
public class TestFrame2 {
public static void main(String[] args) {
MyFrame myFrame1 = new MyFrame(100, 100, 200, 300, Color.blue);
MyFrame myFrame2 = new MyFrame(300, 100, 200, 300, Color.yellow);
MyFrame myFrame3 = new MyFrame(100, 300, 200, 300, Color.red);
MyFrame myFrame4 = new MyFrame(300, 300, 200, 300, Color.pink);
}
}
class MyFrame extends Frame {
static int id = 0; //存在多个窗口,需要一个计数器
public MyFrame(int x,int y,int w,int h,Color color){
super("Myframe"+(++id));
setBackground(color);
setBounds(x,y,w,h);
setVisible(true);
}
}
经过上面的学习,我们基本掌握了GUI中基础的窗口设置;接下来解决窗口的关闭问题;
并且引入面板相关的概念。
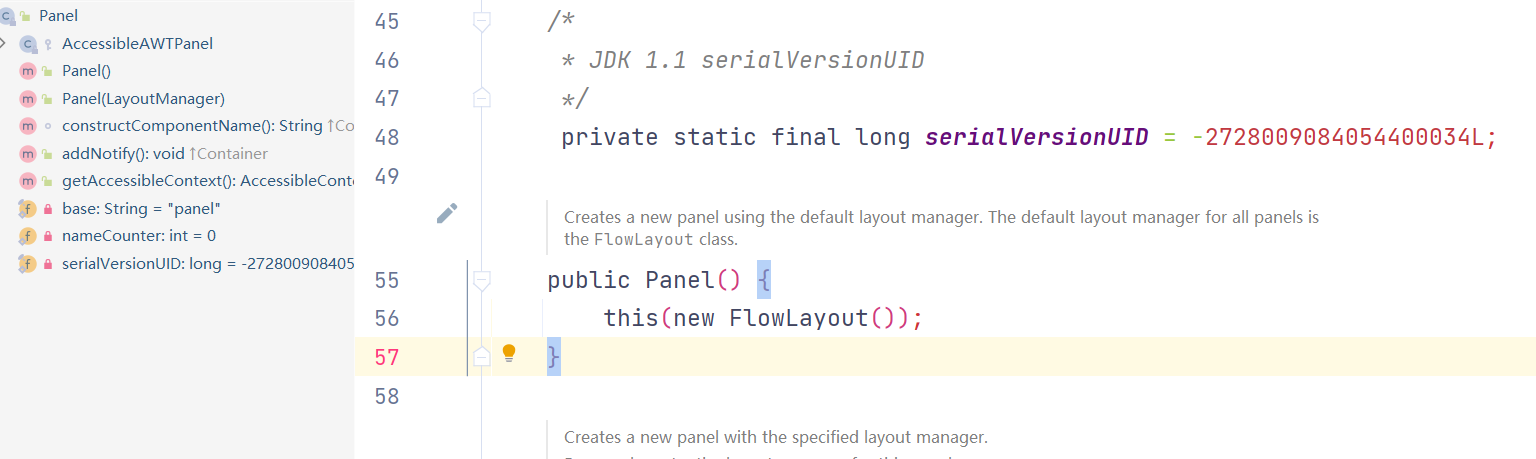
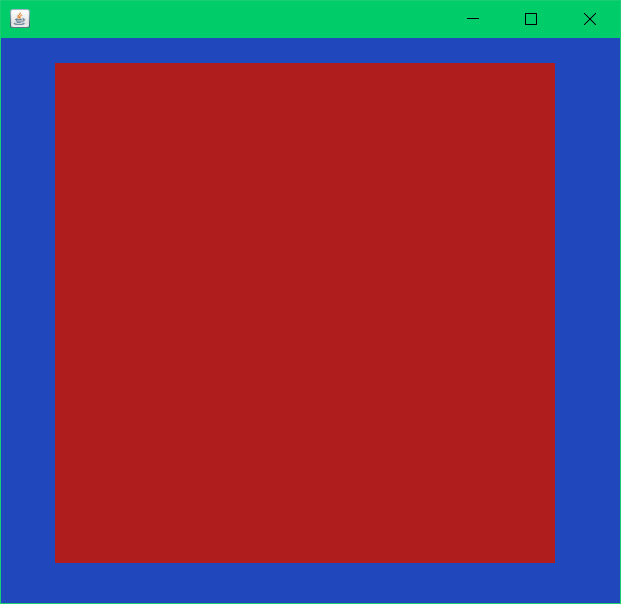
面板操作:解决关闭问题:
一个界面只可以有一个Frame窗体组件,但是可以有多个Panel面板组件,而Panel上也可以使用FlowLayout,BorderLayout,GridLayout等各种布局管理器(后面涉及),这样可以组合使用,达到较为复杂的布局效果。
import java.awt.*;
import java.awt.event.WindowAdapter;
import java.awt.event.WindowEvent;
public class TestPanel {
public static void main(String[] args) {
Frame frame = new Frame();
//布局概念--初始化一个面板
Panel panel = new Panel();
//设置布局
frame.setLayout(null);
//坐标--设置弹出位置以及窗口大小
frame.setBounds(300,300,500,500);
frame.setBackground(new Color(32, 71, 187));
//设置布局坐标,但是是相对于frame的布局
panel.setBounds(50,50,400,400);
//设置背景颜色,需要声明一个颜色实例化对象;
//将实例化的对象传入到面板方法中
panel.setBackground(new Color(175, 29, 29));
//将我们初始化的Panel面板放到frame上
frame.add(panel);
//设置可见性
frame.setVisible(true);
//监听事件 退出:System.exit();
//通过匿名内部类实现自己选择的方法实现
//为Frame窗口组件插个眼,但点击“X”后,会通过适配器自动匹配,到我们重写的方法中,来实现相应的功能
frame.addWindowListener(new WindowAdapter(){
@Override
public void windowClosing(WindowEvent e) {
System.exit(0);
}
});
}
}
WindowAdapter:
用于接收窗口事件的抽象适配器类。 此类中的方法为空。 此类的存在是为了方便创建侦听器对象。
扩展此类以创建WindowEvent侦听器,并覆盖感兴趣事件的方法。
(如果实现WindowListener接口,则必须定义其中的所有方法。此抽象类为所有接口都定义了空方法,因此只需要为你关心的事件定义方法。)
使用扩展类创建一个侦听器对象,然后使用窗口的addWindowListener方法将其注册到Window中。 当窗口的状态由于打开,关闭,激活或停用,图标化或去图标化而改变时,将调用侦听器对象中的相关方法,并将WindowEvent传递给它。
布局管理器:
在使用 [Swing]向容器添加组件时,需要考虑组件的位置和大小。如果不使用布局管理器,则需要先在纸上画好各个组件的位置并计算组件间的距离,再向容器中添加。这样虽然能够灵活控制组件的位置,实现却非常麻烦。
为了加快开发速度,[Java]提供了一些布局管理器,它们可以将组件进行统一管理,这样开发人员就不需要考虑组件是否会重叠等问题。
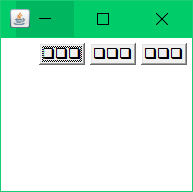
流式布局(FlowLayout)
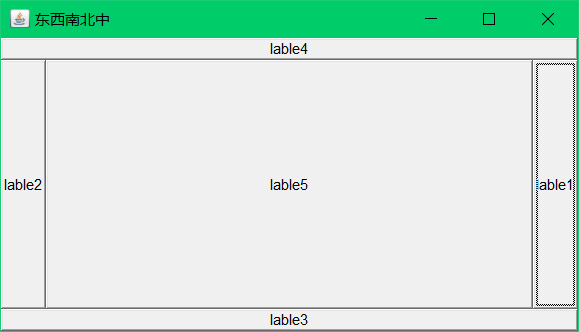
边框布局(BorderLayout) --东西南北中布局
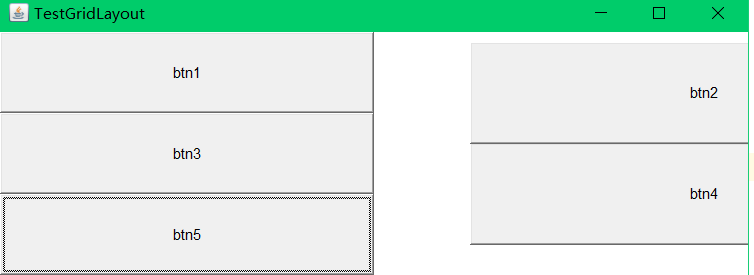
表格布局(GridLayout)
构造一个具有指定对齐方式和默认5单位水平和垂直间隙的新FlowLayout 。
对齐参数的值必须是FlowLayout.LEFT , FlowLayout.RIGHT , FlowLayout.CENTER ,FlowLayout.LEADING或FlowLayout.TRAILING 。
参数:
align –对齐值
流式布局:
import java.awt.*;
import java.awt.event.WindowAdapter;
import java.awt.event.WindowEvent;
public class TestFlowLayout {
public static void main(String[] args) {
Frame frame = new Frame();
//组件-按钮
//当设置中文时会出现乱码的情况
Button button1 = new Button("Button1");
Button button2 = new Button("Button2");
Button button3 = new Button("Button3");
//设置为流式布局
//frame.setLayout(new FlowLayout());
frame.setLayout(new FlowLayout(FlowLayout.RIGHT));
frame.setSize(200,200);
frame.setLocation(300,300);
//把按钮添加到布局上
frame.add(button1);
frame.add(button2);
frame.add(button3);
//设置可见性
frame.setVisible(true);
frame.addWindowListener(new WindowAdapter() {
@Override
public void windowClosing(WindowEvent e) {
System.exit(0);
}
});
}
}
东西南北中布局:
import java.awt.*;
public class TestBorderLayout {
public static void main(String[] args) {
Frame frame = new Frame("东西南北中");
Button lable1 = new Button("lable1");
Button lable2 = new Button("lable2");
Button lable3 = new Button("lable3");
Button lable4 = new Button("lable4");
Button lable5 = new Button("lable5");
//第一个标签在东边,一次标签时西、南、北、中
frame.add(lable1,BorderLayout.EAST);
frame.add(lable2,BorderLayout.WEST);
frame.add(lable3,BorderLayout.SOUTH);
frame.add(lable4,BorderLayout.NORTH);
frame.add(lable5,BorderLayout.CENTER);
frame.setSize(200,200);
frame.setVisible(true);
}
}
表格布局:
import java.awt.*;
public class TestGridLayout {
public static void main(String[] args) {
Frame frame = new Frame("TestGridLayout");
Button btn1 = new Button("btn1");
Button btn2 = new Button("btn2");
Button btn3 = new Button("btn3");
Button btn4 = new Button("btn4");
Button btn5 = new Button("btn5");
//设置布局模式,设置表格三行两列
frame.setLayout(new GridLayout(3,2));
frame.add(btn1);
frame.add(btn2);
frame.add(btn3);
frame.add(btn4);
frame.add(btn5);
frame.pack(); //自动确定最佳位置,使用的是Java函数
frame.setLocation(200,300);
frame.setVisible(true);
}
}
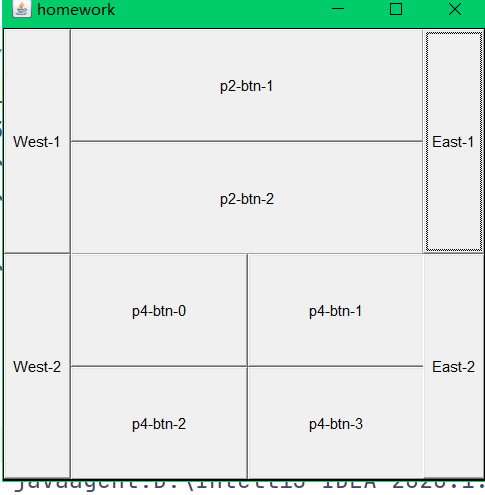
练习:
import java.awt.*;
import java.awt.event.WindowAdapter;
import java.awt.event.WindowEvent;
public class homework {
public static void main(String[] args) {
Frame frame = new Frame("homework");
//设置界面的大小
frame.setSize(400,400);
//启动后弹出的位置
frame.setLocation(300,400);
frame.setBackground(Color.BLACK);
frame.setVisible(true);
// 1.第一个布局
//设置布局frame为两行一列(表格布局)
frame.setLayout(new GridLayout(2,1));
//设置面板
//设置第一行布局
Panel p1 = new Panel(new BorderLayout());
Panel p2 = new Panel(new GridLayout(2,1));
//设置第二行布局
Panel p3 = new Panel(new BorderLayout());
Panel p4 = new Panel(new GridLayout(2,2));
//设置两边的 按钮
p1.add(new Button("East-1"),BorderLayout.EAST);
p1.add(new Button("West-1"),BorderLayout.WEST);
//设置中间的按钮
p2.add(new Button("p2-btn-1"));
p2.add(new Button("p2-btn-2"));
//第二层
p3.add(new Button("East-2"),BorderLayout.EAST);
p3.add(new Button("West-2"),BorderLayout.WEST);
//设置第二行中间按钮
for (int i = 0; i < 4; i++) {
p4.add(new Button("p4-btn-"+i));
}
//将面板p2加入到面板p1中
p1.add(p2,BorderLayout.CENTER);
p3.add(p4,BorderLayout.CENTER);
frame.add(p1);
frame.add(p3);
frame.addWindowListener(new WindowAdapter() {
@Override
public void windowClosing(WindowEvent e) {
System.exit(0);
}
});
}
}
事件监听
AWT的事件处理机制是一种委派式事件处理方式:普通组件(事件源)将整个事件处理委托给特定的对象(事件监听器);当该事件源发生指定的事件时,就通知所委托的事件监听器,由事件监听器来处理这个事件。 每个组件均可以针对特定的事件指定一个或多个事件监听对象,每个事件监听器也可以监听一个或多个事件源.
简单来说,当用户触发某个条件或者事件的时候,处理代码将被自动运行,类似钩子一般。
import java.awt.*;
import java.awt.event.ActionEvent;
import java.awt.event.ActionListener;
import java.awt.event.WindowAdapter;
import java.awt.event.WindowEvent;
public class TestActionEvent {
public static void main(String[] args) {
//按下按钮,触发一些事件
Frame frame = new Frame();
Button button = new Button();
//我们为什么需要构建这个MyActionListener类,是因为按钮监听的时候需要传入一个
/*public synchronized void addActionListener(ActionListener l)*/
MyActionListener myActionListener = new MyActionListener();
button.addActionListener(myActionListener);
//将按钮添加到frame中,并且设置位置居中
frame.add(button,BorderLayout.CENTER);
frame.pack(); //自动匹配最佳位置
frame.setVisible(true);
//关闭窗口
close(frame);
}
//设置监听关闭功能
public static void close(Frame frame){
frame.addWindowListener(new WindowAdapter() {
@Override
public void windowClosing(WindowEvent e) {
System.exit(0); //监听关闭
}
});
}
}
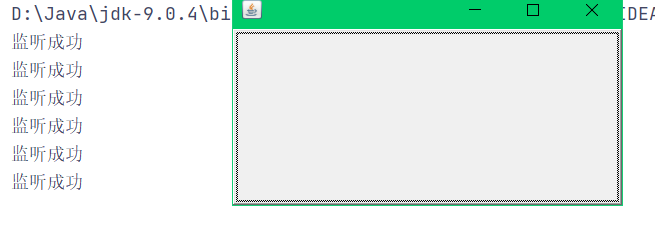
class MyActionListener implements ActionListener {
@Override
public void actionPerformed(ActionEvent e) {
System.out.println("监听成功");
}
}
效果:
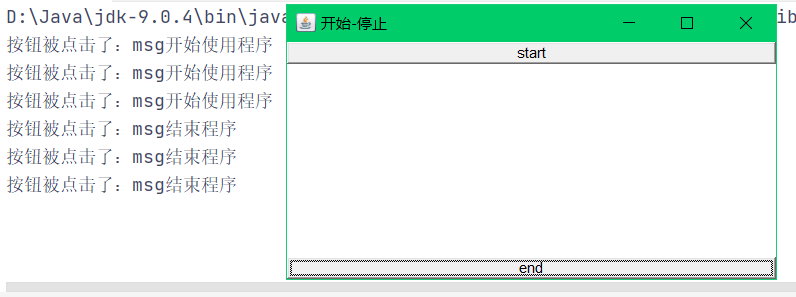
设置两个按钮,来实现同一个监听:
import java.awt.*;
import java.awt.event.ActionEvent;
import java.awt.event.ActionListener;
import java.awt.event.WindowAdapter;
import java.awt.event.WindowEvent;
public class TestActionTwo {
public static void main(String[] args) {
//目标:设置两个按钮,来实现同一个监听
//开始 停止
Frame frame = new Frame("开始-停止");
Button start = new Button("start");
Button end = new Button("end");
//设置信息
start.setActionCommand("开始使用程序");
end.setActionCommand("结束程序");
Mymonitor mymonitor = new Mymonitor();
//这只监听
start.addActionListener(mymonitor);
end.addActionListener(mymonitor);
//设置东南西北中的布局
frame.add(start,BorderLayout.NORTH);
frame.add(end,BorderLayout.SOUTH);
frame.pack();
frame.setVisible(true);
CloseFrame(frame);
}
//设置监听关闭功能
public static void CloseFrame(Frame frame){
frame.addWindowListener(new WindowAdapter(){
@Override
public void windowClosing(WindowEvent e) {
System.exit(0);
}
});
}
}
class Mymonitor implements ActionListener{
@Override
public void actionPerformed(ActionEvent e) {
System.out.println("按钮被点击了:msg"+e.getActionCommand());
}
}
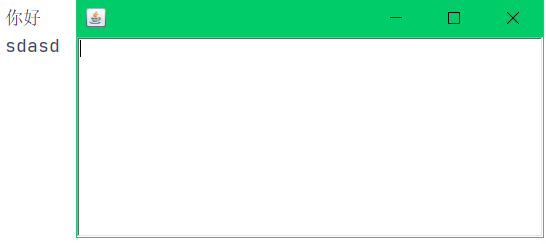
输入框:
import java.awt.*;
import java.awt.event.ActionEvent;
import java.awt.event.ActionListener;
import java.awt.event.WindowAdapter;
import java.awt.event.WindowEvent;
public class TestText01 {
public static void main(String[] args) {
//启动
new MyFrame();
}
}
//这里采用继承的方式,来实现窗口。
class MyFrame extends Frame {
public MyFrame(){
//设置文本对象
TextField textField = new TextField();
add(textField); //添加到frame中
//监听输入的文字
MyAcrionLister myAcrionLister = new MyAcrionLister();
//触发输入框事件
textField.addActionListener(myAcrionLister);
//设置替换编码--使得输入的内容转换为*
textField.setEchoChar('*');
setVisible(true); //设置可视化
pack(); //自适应
//监听关闭程序
addWindowListener(new WindowAdapter(){
@Override
public void windowClosing(WindowEvent e) {
System.exit(0);
}
});
}
}
class MyAcrionLister implements ActionListener {
@Override
public void actionPerformed(ActionEvent e) {
//获取资源,返回一个对象
//e.getSource()获得触发的对象
TextField filed = (TextField)e.getSource();
System.out.println(filed.getText());
//输入完清空
filed.setText("");
}
}
注解:一般常见于Java 的awt, swing的事件处理里面,e是指一个事件,如ActionEvent,MouseMoveEvent等,它有一个事件发起者,用e.getSource()可以获得,但getSource()返回的是Object类型(保持方法的通用性),所以如果已经知道是按钮产生的事件,可以用(JButton)e.getSourse()强制转换成JButton对象,这样就可以用JButton对象的方法了
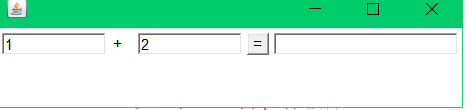
基本计算器实现:
基础写法:(面向过程的)
package com.xbhog.lession1;
import java.awt.*;
import java.awt.event.ActionEvent;
import java.awt.event.ActionListener;
import java.awt.event.WindowAdapter;
import java.awt.event.WindowEvent;
import java.io.File;
public class TestCalc {
public static void main(String[] args) {
new MyCalculator();
}
}
class MyCalculator extends Frame {
public MyCalculator(){
/*1、 三个文本框*/
TextField num1 = new TextField(10);//设置该文本框所能容纳的字符数
TextField num2 = new TextField(10);//设置该文本框所能容纳的字符数
TextField num3 = new TextField(20);//设置该文本框所能容纳的字符数
/*2、 一个按钮*/
Button button = new Button("=");
ButtonAu buttonAu = new ButtonAu(num1,num2,num3);
//设置按钮监听器
button.addActionListener(buttonAu);
/*3、一个标签*/
Label label = new Label("+");
//设置流式布局
setLayout(new FlowLayout());
add(num1);
add(label);
add(num2);
add(button);
add(num3);
pack();
setVisible(true);
//设置监听器,关闭程序
addWindowListener(new WindowAdapter(){
@Override
public void windowClosing(WindowEvent e) {
System.exit(0);
}
});
}
}
class ButtonAu implements ActionListener {
private TextField num1,num2,num3;
public ButtonAu(TextField num1,TextField num2,TextField num3){
this.num1 = num1;
this.num2 = num2;
this.num3 = num3;
}
@Override
public void actionPerformed(ActionEvent e) {
/*1、获取num1与num2的值*/
int n1 = Integer.parseInt(num1.getText());
int n2 = Integer.parseInt(num2.getText());
/*2、将两个值相加传给num3;*/
num3.setText(""+(n1+n2)); //强转
/*3、设num2、num1的值为空*/
num1.setText("");
num2.setText("");
}
}
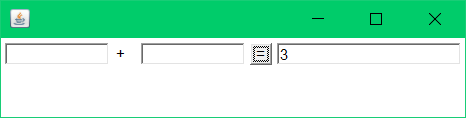
实现效果:
升级版:(面向对象)+组合概念
package com.xbhog.lession1;
import java.awt.*;
import java.awt.event.ActionEvent;
import java.awt.event.ActionListener;
import java.awt.event.WindowAdapter;
import java.awt.event.WindowEvent;
import java.io.File;
public class TestCalc {
public static void main(String[] args) {
new MyCalculator().loadFrame();
}
}
//计算器类
class MyCalculator extends Frame {
TextField num1;
TextField num2;
TextField num3;
public void loadFrame(){
/*1、 三个文本框*/
num1 = new TextField(10);//设置该文本框所能容纳的字符数
num2 = new TextField(10);//设置该文本框所能容纳的字符数
num3 = new TextField(20);//设置该文本框所能容纳的字符数
/*2、 一个按钮*/
Button button = new Button("=");
/*3、一个标签*/
Label label = new Label("+");
ButtonAu buttonAu = new ButtonAu(this); //this指代的当前计算器类
//设置按钮监听器
button.addActionListener(buttonAu);
//设置流式布局
setLayout(new FlowLayout());
add(num1);
add(label);
add(num2);
add(button);
add(num3);
pack();
setVisible(true);
//设置监听器,关闭程序
addWindowListener(new WindowAdapter(){
@Override
public void windowClosing(WindowEvent e) {
System.exit(0);
}
});
}
}
class ButtonAu implements ActionListener {
private MyCalculator mycala = null;
public ButtonAu(MyCalculator mycala){
this.mycala = mycala;
}
@Override
public void actionPerformed(ActionEvent e) {
/*1、获取num1与num2的值*/
int n1 = Integer.parseInt(mycala.num1.getText());
int n2 = Integer.parseInt(mycala.num2.getText());
/*2、将两个值相加传给num3;*/
mycala.num3.setText(""+(n1+n2)); //强转
/*3、设num2、num1的值为空*/
mycala.num1.setText("");
mycala.num2.setText("");
}
}
高级写法:(内部类)
内部类最大的好处是:能够畅通无阻的访问外部类
package com.xbhog.lession1;
import java.awt.*;
import java.awt.event.ActionEvent;
import java.awt.event.ActionListener;
import java.awt.event.WindowAdapter;
import java.awt.event.WindowEvent;
import java.io.File;
public class TestCalc {
public static void main(String[] args) {
new MyCalculator().loadFrame();
}
}
class MyCalculator extends Frame {
TextField num1;
TextField num2;
TextField num3;
public void loadFrame(){
/*1、 三个文本框*/
num1 = new TextField(10);//设置该文本框所能容纳的字符数
num2 = new TextField(10);//设置该文本框所能容纳的字符数
num3 = new TextField(20);//设置该文本框所能容纳的字符数
/*2、 一个按钮*/
Button button = new Button("=");
/*3、一个标签*/
Label label = new Label("+");
//设置按钮监听器
//传入内部类
button.addActionListener(new ButtonAu());
//设置流式布局
setLayout(new FlowLayout());
add(num1);
add(label);
add(num2);
add(button);
add(num3);
pack();
setVisible(true);
//设置监听器,关闭程序
addWindowListener(new WindowAdapter(){
@Override
public void windowClosing(WindowEvent e) {
System.exit(0);
}
});
}
class ButtonAu implements ActionListener {
@Override
public void actionPerformed(ActionEvent e) {
/*1、获取num1与num2的值*/
int n1 = Integer.parseInt(num1.getText());
int n2 = Integer.parseInt(num2.getText());
/*2、将两个值相加传给num3;*/
num3.setText(""+(n1+n2)); //强转
/*3、设num2、num1的值为空*/
num1.setText("");
num2.setText("");
}
}
}
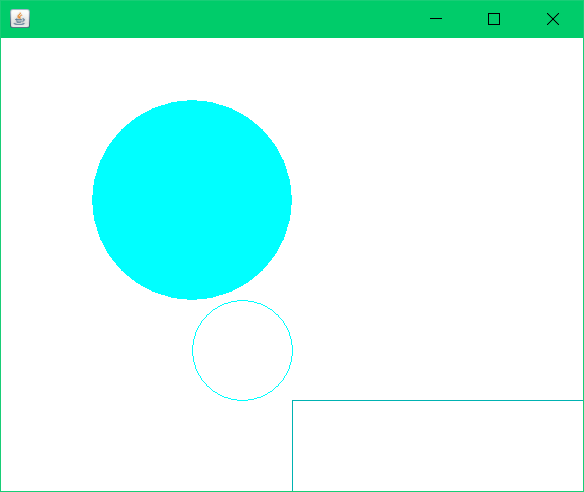
画笔:
import java.awt.*;
public class TestPaint {
public static void main(String[] args) {
//调用对象中的方法
new Mypaint().LoadFrame();
}
}
class Mypaint extends Frame {
public void LoadFrame(){
setBounds(100,100,600,500); //设置画布的长宽高
setVisible(true);//设置可见性
}
@Override
public void paint(Graphics g) {
g.setColor(Color.CYAN); // 设置画笔颜色
g.fillOval(100,100,200,200); //画个实心圆;
g.drawOval(200,300,100,100);
g.draw3DRect(300,400,300,300,false);
//养成习惯,画笔用完,将他还原成最初的颜色
}
}
设置了画笔颜色:
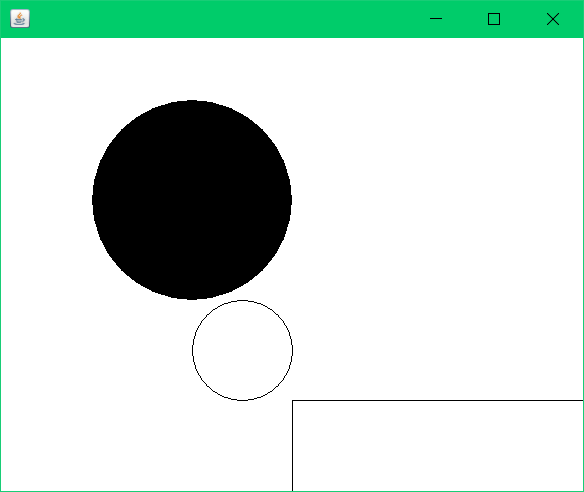
初始画笔:
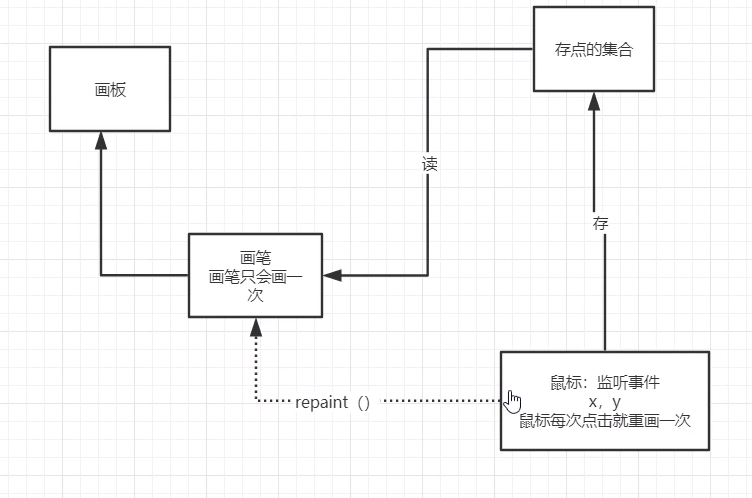
鼠标监听事件:
目的:实现鼠标画画--》最简单的点击
import java.awt.*;
import java.awt.event.MouseAdapter;
import java.awt.event.MouseEvent;
import java.util.ArrayList;
import java.util.Iterator;
public class TestMouseLister {
public static void main(String[] args) {
new MyFrame("画图");
}
}
class MyFrame extends Frame {
//画画需要画笔,需要监听鼠标当前的位置,需要集合来存储这个点
ArrayList points;
public MyFrame(String title) {
//设置标题
super(title);
setBounds(200,200,400,300);
//保存鼠标点击的点
points = new ArrayList();
setVisible(true);
//内部函数
this.addMouseListener(new MouseAdapter(){
@Override
public void mousePressed(MouseEvent e) {
MyFrame frame = (MyFrame) e.getSource();
frame.addPoint(new Point(e.getX(),e.getY()));
//每次点击鼠标都需要重新画一边
frame.repaint();
}
});
}
/* //适配器模式
private class MyMouseListener extends MouseAdapter {
//鼠标 按下,弹起,按住不放
@Override
public void mousePressed(MouseEvent e) {
MyFrame frame = (MyFrame) e.getSource();
frame.addPoint(new Point(e.getX(),e.getY()));
//每次点击鼠标都需要重新画一边
frame.repaint();
}
}
*/
@Override
public void paint(Graphics g) {
//画画,监听鼠标事件
Iterator iterator = points.iterator();
while(iterator.hasNext()){
Point point = (Point) iterator.next();
g.setColor(Color.BLUE);
g.fillOval(point.x,point.y,10,10);
}
}
//传入点,添加到点的集合中
public void addPoint(Point point){
points.add(point);
}
}
窗口监听:
import java.awt.*;
import java.awt.event.WindowAdapter;
import java.awt.event.WindowEvent;
public class TestWindowFrame {
public static void main(String[] args) {
new WindowsFrame();
}
}
class WindowsFrame extends Frame {
public WindowsFrame(){
setBackground(Color.blue);
setBounds(100,100,200,200);
setVisible(true);
//匿名函数
this.addWindowListener(new WindowAdapter(){
@Override
public void windowClosing(WindowEvent e) {
System.out.println("windowClosing");
System.exit(0);
}
@Override
public void windowClosed(WindowEvent e) {
System.out.println("windowClosed");
}
@Override
public void windowActivated(WindowEvent e) {
WindowsFrame windowsFrame = (WindowsFrame) e.getSource();
windowsFrame.setTitle("被激活了");
System.out.println("windowActivated");
}
});
}
}
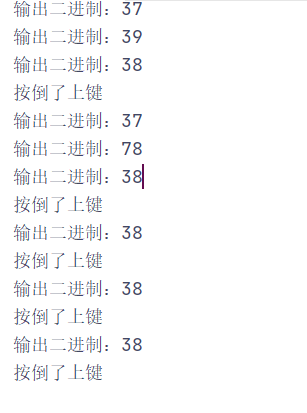
键盘监听:
import java.awt.*;
import java.awt.event.KeyAdapter;
import java.awt.event.KeyEvent;
public class TestKeyListener {
public static void main(String[] args) {
new KeyFrame();
}
}
class KeyFrame extends Frame {
public KeyFrame(){
setVisible(true);
setBounds(100,200,300,400);
//键盘监听事件
this.addKeyListener(new KeyAdapter() {
@Override
public void keyPressed(KeyEvent e) {
int keyCode = e.getKeyCode();
System.out.println("输出二进制:"+keyCode);
if(keyCode == KeyEvent.VK_UP){
System.out.println("按倒了上键");
}
}
});
}
}
效果图:
Swing学习:
初始化框:
import javax.swing.*;
import java.awt.*;
public class JframeDemo {
public static void main(String[] args) {
new Myjframe().init();
}
}
class Myjframe extends JFrame {
public void init(){
JFrame jf = new JFrame("这是一个JFrame窗口");
jf.setVisible(true);
jf.setBounds(100,200,300,400);
jf.setDefaultCloseOperation(WindowConstants.EXIT_ON_CLOSE);
JLabel lable = new JLabel("欢迎来到xbhog博客");
jf.add(lable);
//标签居中
lable.setHorizontalAlignment(SwingConstants.CENTER);
//获得一个容器
Container contentPane = jf.getContentPane();
//设置背景
contentPane.setBackground(Color.yellow);
}
}
效果:
![image-20210430100244471]()
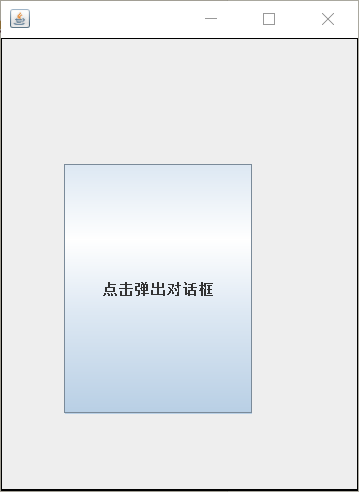
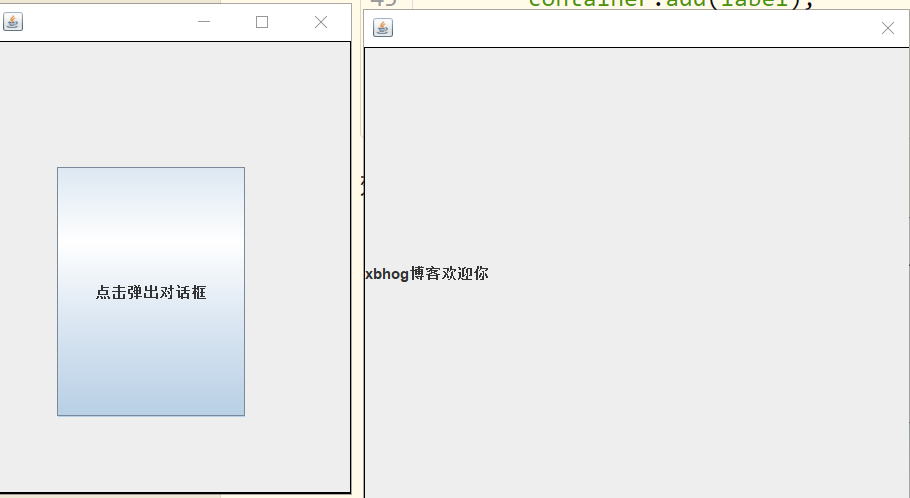
Jdialog弹窗:
import javax.swing.*;
import java.awt.*;
import java.awt.event.ActionEvent;
import java.awt.event.ActionListener;
public class JDialogDemo extends JFrame {
public JDialogDemo(){
this.setVisible(true);
this.setBounds(100,200,300,400);
//自动关闭
this.setDefaultCloseOperation(WindowConstants.EXIT_ON_CLOSE);
//实例化容器
Container container = this.getContentPane();
//设置绝对定位
container.setLayout(null);
JButton Button = new JButton("点击弹出对话框");
Button.setBounds(50,100,150,200);
//点击按钮弹出窗口
Button.addActionListener(new ActionListener() {
@Override
public void actionPerformed(ActionEvent e) {
new MyJdialogDemo();
}
});
//将按钮添加到容器上显示
container.add(Button);
}
public static void main(String[] args) {
new JDialogDemo();
}
}
class MyJdialogDemo extends JDialog{
public MyJdialogDemo() {
this.setVisible(true);
this.setBounds(100,200,300,400);
//不需要设置关闭,自带
//实例化容器
Container container = this.getContentPane();
//container.setLayout(null);
JLabel label = new JLabel("xbhog博客欢迎你");
container.add(label);
}
}
效果图:
标签icon、imageIcon:
package com.xbhog.Lession3;
import javax.swing.*;
import java.awt.*;
public class IconDemo extends JFrame implements Icon {
private int width;
private int height;
public IconDemo(){}
public IconDemo(int width, int height){
this.width = width;
this.height = height;
}
public void init(){
IconDemo iconDemo = new IconDemo(15,15);
//设置便签的
JLabel label = new JLabel("icontest", iconDemo, SwingConstants.CENTER);
Container container = getContentPane();
container.add(label);
this.setBounds(100,100,100,100);
this.setVisible(true);
this.setDefaultCloseOperation(WindowConstants.EXIT_ON_CLOSE);
}
@Override
public void paintIcon(Component c, Graphics g, int x, int y) {
g.fillOval(100,100,15,15);
}
@Override
public int getIconWidth() {
return this.width;
}
@Override
public int getIconHeight() {
return this.height;
}
public static void main(String[] args){
new IconDemo().init();
}
}
![image-20210502160839460]()
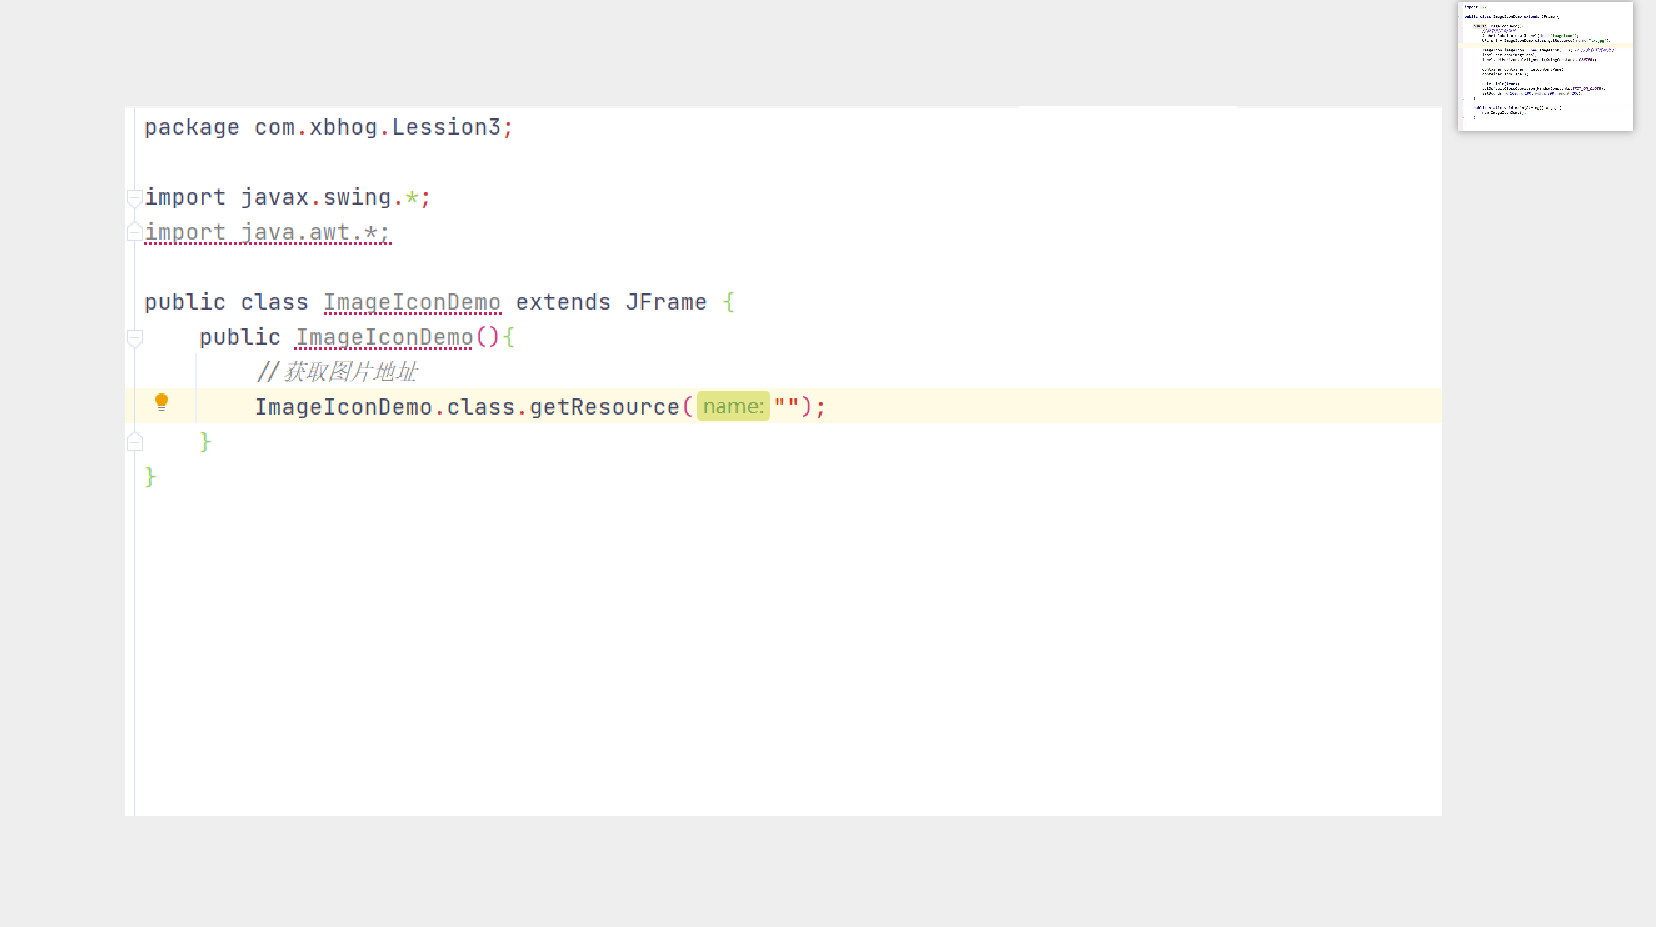
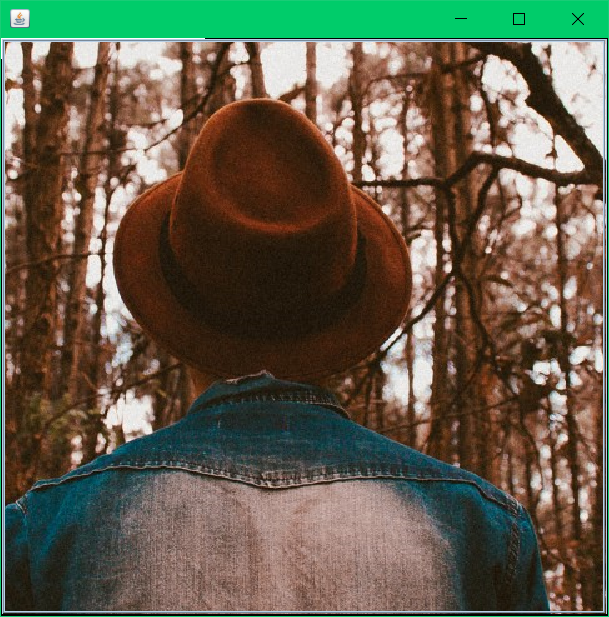
图片标签:
package com.xbhog.Lession3;
import javax.swing.*;
import java.awt.*;
import java.net.URL;
public class ImageIconDemo extends JFrame {
public ImageIconDemo(){
//获取图片地址
JLabel label = new JLabel();
URL url = ImageIconDemo.class.getResource("img.png");
//设置图片
ImageIcon imageIcon = new ImageIcon(url);
label.setIcon(imageIcon);
//居中
label.setHorizontalAlignment(SwingConstants.CENTER);
//加入容器中
Container container = getContentPane();
container.add(label);
setVisible(true);
setDefaultCloseOperation(WindowConstants.EXIT_ON_CLOSE);
setBounds(100,200,300,400);
}
public static void main(String[] args){
new ImageIconDemo();
}
}
图片按钮、单选框、多选框
图片按钮:
package com.xbhog.Lession4;
import javax.swing.*;
import java.awt.*;
import java.net.URL;
public class ImageButton extends JFrame {
public ImageButton(){
Container container = this.getContentPane();
//获取该类同级目录下的资源
URL resource = ImageButton.class.getResource("img.png");
//将图片设置为图标
Icon icon = new ImageIcon(resource);
JButton button = new JButton();
//设置按钮的图标
button.setIcon(icon);
container.add(button);
this.setVisible(true);
this.setSize(500,500);
this.setDefaultCloseOperation(WindowConstants.EXIT_ON_CLOSE);
}
public static void main(String[] args) {
new ImageButton();
}
}
效果图:
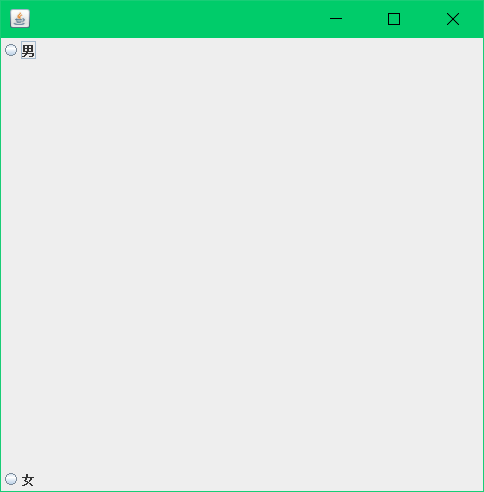
单选框:
package com.xbhog.Lession4;
import javax.swing.*;
import java.awt.*;
public class RadioButtons extends JFrame {
public RadioButtons(){
Container container = this.getContentPane();
JRadioButton jRadioButtons1 = new JRadioButton("男");
JRadioButton jRadioButtons2 = new JRadioButton("女");
ButtonGroup buttonGroup = new ButtonGroup();
buttonGroup.add(jRadioButtons1);
buttonGroup.add(jRadioButtons2);
container.add(jRadioButtons1,BorderLayout.NORTH);
container.add(jRadioButtons2,BorderLayout.SOUTH);
this.setVisible(true);
this.setSize(500,500);
this.setDefaultCloseOperation(WindowConstants.EXIT_ON_CLOSE);
}
public static void main(String[] args) {
new RadioButtons();
}
}
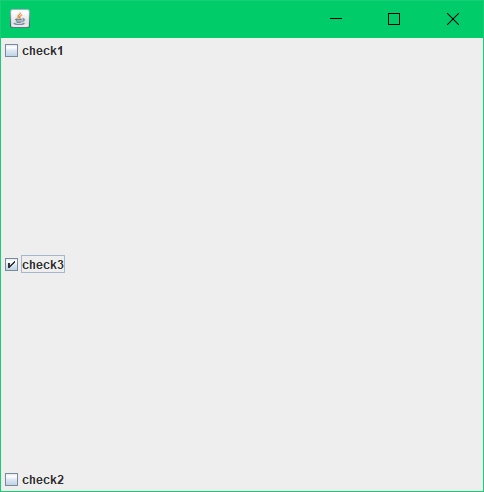
多选框:
package com.xbhog.Lession4;
import javafx.scene.control.CheckBox;
import javax.swing.*;
import java.awt.*;
public class RadioButtons extends JFrame {
public RadioButtons(){
Container container = this.getContentPane();
JCheckBox checkBox1 = new JCheckBox("check1");
JCheckBox checkBox2 = new JCheckBox("check2");
JCheckBox checkBox3 = new JCheckBox("check3");
container.add(checkBox1,BorderLayout.NORTH);
container.add(checkBox2,BorderLayout.SOUTH);
container.add(checkBox3,BorderLayout.CENTER);
this.setVisible(true);
this.setSize(500,500);
this.setDefaultCloseOperation(WindowConstants.EXIT_ON_CLOSE);
}
public static void main(String[] args) {
new RadioButtons();
}
}
下拉框、列表框:
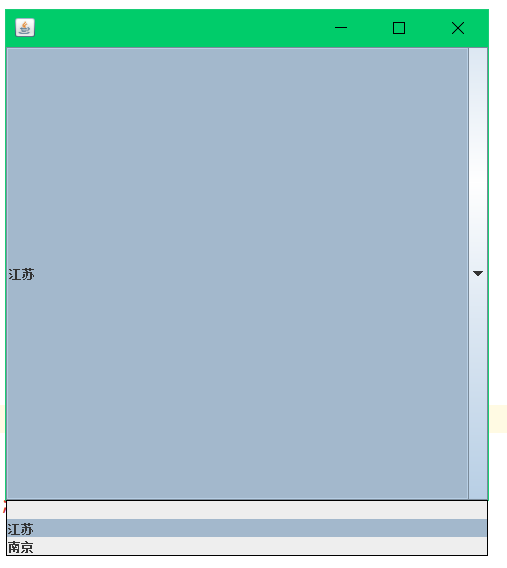
下拉框:
package com.xbhog.Lession4;
import javax.swing.*;
import java.awt.*;
public class ComboboxDemo extends JFrame {
public ComboboxDemo(){
Container container = this.getContentPane();
JComboBox jComboBox = new JComboBox();
jComboBox.setSize(100,300); //设置下拉框的大小
jComboBox.addItem(null);
jComboBox.addItem("江苏");
jComboBox.addItem("南京");
container.add(jComboBox);
this.setVisible(true);
this.setSize(500,500);;
this.setDefaultCloseOperation(WindowConstants.EXIT_ON_CLOSE);
}
public static void main(String[] args) {
new ComboboxDemo();
}
}
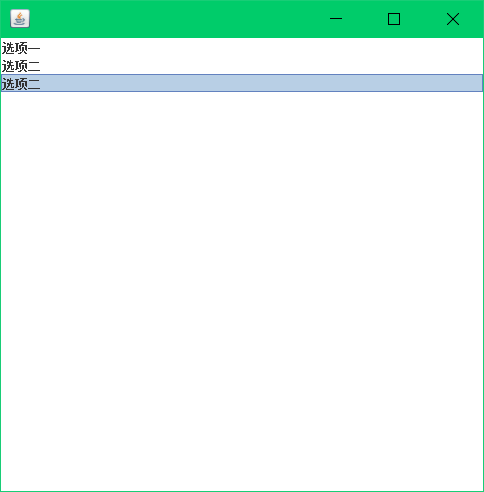
列表框:
package com.xbhog.Lession4;
import javax.swing.*;
import java.awt.*;
public class JListDemo extends JFrame {
public JListDemo(){
Container container = this.getContentPane();
String[] str = {"选项一","选项二","选项二"};
JList list = new JList(str);
list.setSize(100,200);//设置宽高
container.add(list,BorderLayout.CENTER);
this.setVisible(true);
this.setSize(500,500);;
this.setDefaultCloseOperation(WindowConstants.EXIT_ON_CLOSE);
}
public static void main(String[] args) {
new JListDemo();
}
}
文本框 密码框 文本域:
package com.xbhog.Lession5;
import javax.swing.*;
import java.awt.*;
public class FIledDemo extends JFrame {
public FIledDemo(){
Container container = this.getContentPane();
//文本框
//TextField text = new TextField(); //设置文本框,默认值为hello,允许的字符数
//container.add(text,BorderLayout.CENTER);
//密码框
/*JPasswordField jPasswordField = new JPasswordField();
jPasswordField.setEchoChar('*'); //设置输入的格式*/
//container.add(jPasswordField);
TextArea textArea = new TextArea(20,30); //设置文本域的长宽
textArea.setText("欢迎来到xbhog的博客");
JScrollPane jScrollPane = new JScrollPane(textArea);
container.add(jScrollPane);
this.setVisible(true);
this.setSize(500,500);;
this.setDefaultCloseOperation(WindowConstants.EXIT_ON_CLOSE);
}
public static void main(String[] args) {
new FIledDemo();
}
}
贪吃蛇:
优化部分:
积分越高等级越高,等级越高timer定时频率越快
小蛇撞墙增加失败判断
食物分不同颜色,不同分数身体增长长度不同,或者减少长度,或者小蛇死掉
小蛇转向方向,不能和原来的方向正相反
鼠标控制方向
游戏记录存数据库
连击对战
登录
|