| python调用打印机打印文件,图片,pdf等 | 您所在的位置:网站首页 › 打印图片pdf › python调用打印机打印文件,图片,pdf等 |
python调用打印机打印文件,图片,pdf等
|
引言 python连接打印机进行打印,可能根据需求的不同,使用不同的函数模块。 如果你只是简单的想打印文档,比如office文档,你可以使用ShellExecute方法,对于微软office的文档、pdf、txt等有用,你可以尝试下; 如果你输入某些数据,文字信息,就想直接把它发送给打印机打印,那么可以尝试使用win32print; 如果你有一张图片,那么你可以结合python的Python Imaging Library(PIL)和win32ui模块进行打印;普通打印 ShellExecute 首先确保你电脑中的应用可以打开你要打印的文件; 是一些标准的文件类型 不用管哪些打印机,也就是说和连接的打印机型号无关; 你无控制设置打印属性的权限; 1 2 3 4 5 6 7 8 9 10 11 12 13 14 15 16 17 18 import tempfile import win32api import win32print filename = tempfile.mktemp (".txt") open (filename, "w").write ("This is a test") win32api.ShellExecute ( 0, "print", filename, # # If this is None, the default printer will # be used anyway. # '/d:"%s"' % win32print.GetDefaultPrinter (), ".", 0 )另一个版本 1 2 3 4 5 6 7 8 9 10 11 12 13 14 import tempfile import win32api import win32print filename = tempfile.mktemp (".txt") open (filename, "w").write ("This is a test") win32api.ShellExecute ( 0, "printto", filename, '"%s"' % win32print.GetDefaultPrinter (), ".", 0 )直接打印数据 win32print 直接将数据扔给打印机; 快速而且容易; 而且可以定义选择哪个打印机打印; 但是要打印的数据必须是可打印的,例如字符串等; 1 2 3 4 5 6 7 8 9 10 11 12 13 14 15 16 17 18 19 20 21 22 23 import os, sys import win32print printer_name = win32print.GetDefaultPrinter () # # raw_data could equally be raw PCL/PS read from # some print-to-file operation # if sys.version_info >= (3,): raw_data = bytes ("This is a test", "utf-8") else: raw_data = "This is a test" hPrinter = win32print.OpenPrinter (printer_name) try: hJob = win32print.StartDocPrinter (hPrinter, 1, ("test of raw data", None, "RAW")) try: win32print.StartPagePrinter (hPrinter) win32print.WritePrinter (hPrinter, raw_data) win32print.EndPagePrinter (hPrinter) finally: win32print.EndDocPrinter (hPrinter) finally: win32print.ClosePrinter (hPrinter)打印图片
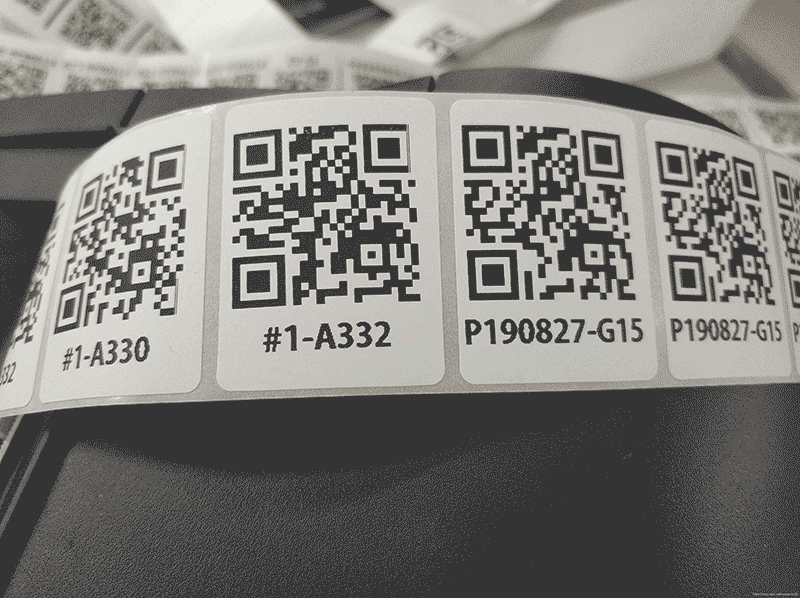
PIL win32ui 不使用额外的工具,在windows电脑上打印一张图片是相当的困难,至少需要3种不同的且相关的设备环境才可以。还好,device-independent bitmap(DIB)和PIL可以帮助我们快速打印。下面的代码可以将图片发送至打印机打印尽可能大的尺寸且不失比例。 还可以选择使用哪个打印机 选择加载的图片的格式等 但是如果你电脑不是windows,那可能不是最好的方法; 1 2 3 4 5 6 7 8 9 10 11 12 13 14 15 16 17 18 19 20 21 22 23 24 25 26 27 28 29 30 31 32 33 34 35 36 37 38 39 40 41 42 43 44 45 46 47 48 49 50 51 52 53 54 55 56 57 58 59 60 61 62 63 64 65 66 67 68 69 70 71 72 73 74 75 76 77 import win32print import win32ui from PIL import Image, ImageWin # # Constants for GetDeviceCaps # # # HORZRES / VERTRES = printable area # HORZRES = 8 VERTRES = 10 # # LOGPIXELS = dots per inch # LOGPIXELSX = 88 LOGPIXELSY = 90 # # PHYSICALWIDTH/HEIGHT = total area # PHYSICALWIDTH = 110 PHYSICALHEIGHT = 111 # # PHYSICALOFFSETX/Y = left / top margin # PHYSICALOFFSETX = 112 PHYSICALOFFSETY = 113 printer_name = win32print.GetDefaultPrinter () file_name = "test.jpg" # # You can only write a Device-independent bitmap # directly to a Windows device context; therefore # we need (for ease) to use the Python Imaging # Library to manipulate the image. # # Create a device context from a named printer # and assess the printable size of the paper. # hDC = win32ui.CreateDC () hDC.CreatePrinterDC (printer_name) printable_area = hDC.GetDeviceCaps (HORZRES), hDC.GetDeviceCaps (VERTRES) printer_size = hDC.GetDeviceCaps (PHYSICALWIDTH), hDC.GetDeviceCaps (PHYSICALHEIGHT) printer_margins = hDC.GetDeviceCaps (PHYSICALOFFSETX), hDC.GetDeviceCaps (PHYSICALOFFSETY) # # Open the image, rotate it if it's wider than # it is high, and work out how much to multiply # each pixel by to get it as big as possible on # the page without distorting. # bmp = Image.open (file_name) if bmp.size[0] > bmp.size[1]: bmp = bmp.rotate (90) ratios = [1.0 * printable_area[0] / bmp.size[0], 1.0 * printable_area[1] / bmp.size[1]] scale = min (ratios) # # Start the print job, and draw the bitmap to # the printer device at the scaled size. # hDC.StartDoc (file_name) hDC.StartPage () dib = ImageWin.Dib (bmp) scaled_width, scaled_height = [int (scale * i) for i in bmp.size] x1 = int ((printer_size[0] - scaled_width) / 2) y1 = int ((printer_size[1] - scaled_height) / 2) x2 = x1 + scaled_width y2 = y1 + scaled_height dib.draw (hDC.GetHandleOutput (), (x1, y1, x2, y2)) hDC.EndPage () hDC.EndDoc () hDC.DeleteDC ()实践 从前台传来要打印的字符,后端生成二维码,并作出相应处理后,连接打印机打印图片。 1 2 3 4 5 6 7 8 9 10 11 12 13 14 15 16 17 18 19 20 21 22 23 24 25 26 27 28 29 30 31 32 33 34 35 36 37 38 39 40 41 42 43 44 45 46 47 48 49 50 51 52 53 54 55 56 57 58 59 60 61 62 63 64 65 66 67 68 69 70 71 72 73 74 75 76 77 78 79 80 81 82 83 84 85 86 87 88 89 90 91 92 93 94 # 打印二维码 def print_barcode(request): import pyqrcode import random,string from PIL import Image,ImageDraw,ImageFont import numpy as np if request.is_ajax() and requesthod == 'POST': result = {} bar_string = 'NaN' type = request.POST['type'] if type == 'box': # 生成箱子码 # 格式:P190823-K91 [P][日期][-][A-Z][0-9][0-9] bar_string = 'P'+datetime.date.today().strftime('%y%m%d')+'-'+str(random.choice('ABCDEFGHIGKLMNOPQRSTUVWXYZ'))\ + str(random.choice(range(10)))+ str(random.choice(range(10))) elif type == 'kuwei': # 生成库位码 bar_string = request.POST['string'] else: pass try: big_code = pyqrcode.create(bar_string, error='L', version=2 , mode='binary') big_code.png('./code.png', scale=8) img_code = Image.open('code.png') size = img_code.size img_final = Image.new('RGB', (size[0], size[1]+35), color=(255, 255, 255)) img_final.paste(img_code, (0, 0, size[0], size[1])) draw = ImageDraw.Draw(img_final) font = ImageFont.truetype('AdobeGothicStd-Bold.otf', size=35) width, height = draw.textsize(bar_string,font=font) draw.text(((size[0]-width)/2, size[1]-15), bar_string , fill=(0, 0, 0), font=font) img_final.save('./code.png') # 然后连接打印机将其打印出来即可 is_ok =[] if type == 'box': for i in range(4): temp = print_img('./code.png') is_ok.append(temp) else: temp = print_img('./code.png') is_ok.append(temp) # is_ok = True result['done'] = 'ok' if np.all(is_ok) else '连接打印机失败' except Exception as e: result['done'] = e return JsonResponse(result) def print_img(img): import win32print import win32ui from PIL import Image, ImageWin # 参考 http://timgolden.me.uk/python/win32_how_do_i/print.html#win32print try: printer_name = win32print.GetDefaultPrinter() hDC = win32ui.CreateDC() hDC.CreatePrinterDC(printer_name) #printable_area = (300, 270) # 打印纸尺寸 #printer_size = (300, 270) # 打开图片并缩放 bmp = Image.open(img) if bmp.size[0] < bmp.size[1]: bmp = bmp.rotate(90) # ratios = [1.0 * printable_area[0] / bmp.size[1], 1.0 * printable_area[1] / bmp.size[0]] # scale = min(ratios) scale = 1 hDC.StartDoc(img) hDC.StartPage() dib = ImageWin.Dib(bmp) scaled_width, scaled_height = [int(scale * i) for i in bmp.size] x1 = 20 # 控制位置 y1 = -30 x2 = x1 + scaled_width y2 = y1 + scaled_height dib.draw(hDC.GetHandleOutput(), (x1, y1, x2, y2)) hDC.EndPage() hDC.EndDoc() hDC.DeleteDC() return True except: return False打印效果:
仅供学习使用 |

【本文地址】
公司简介
联系我们