| 鸿蒙harmony天气预报Demo | 您所在的位置:网站首页 › 天气预报全景图片 › 鸿蒙harmony天气预报Demo |
鸿蒙harmony天气预报Demo
|
1.准备工作
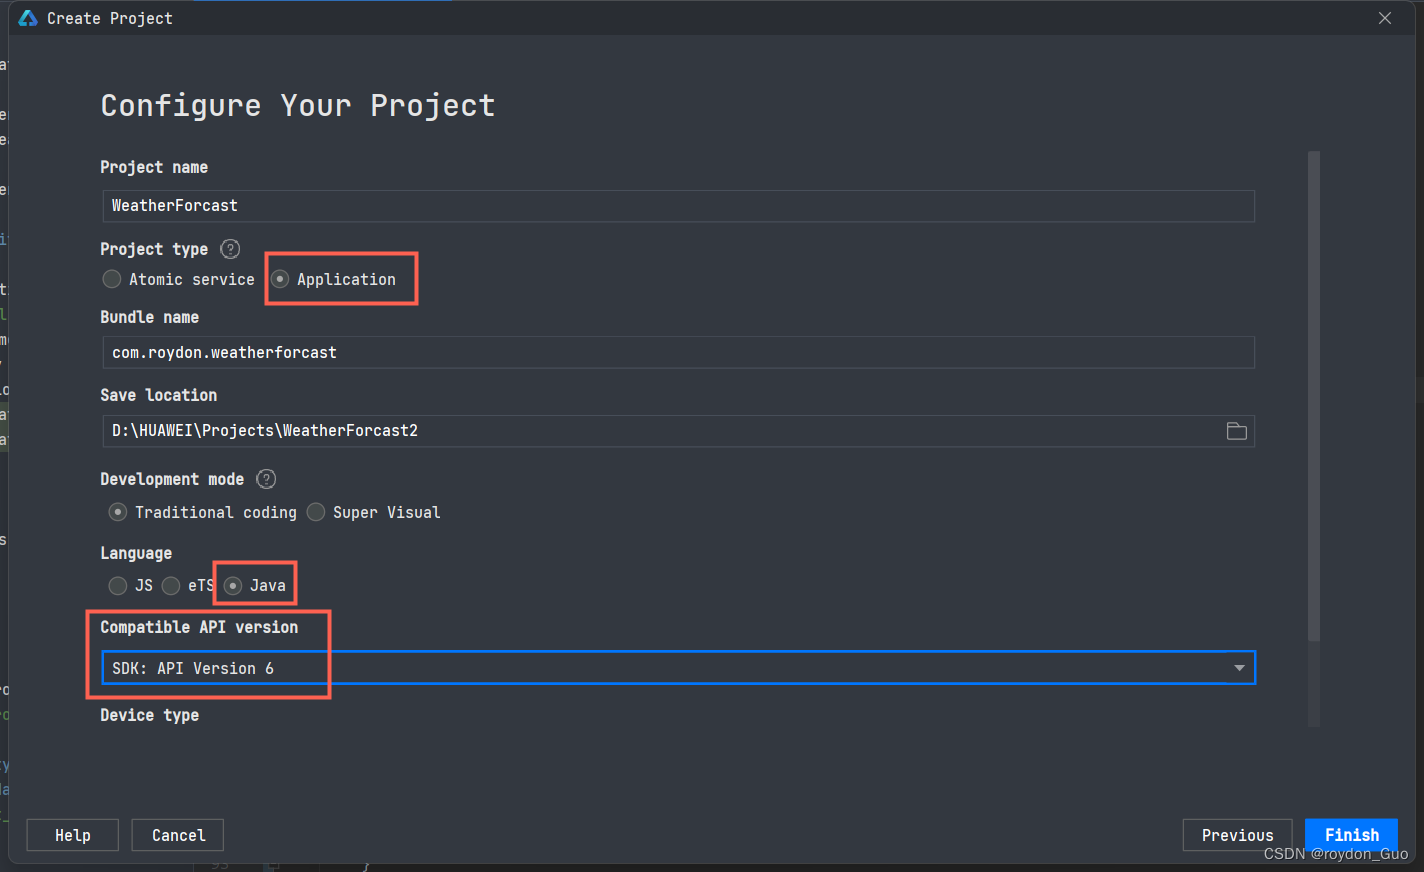
1.1创建项目
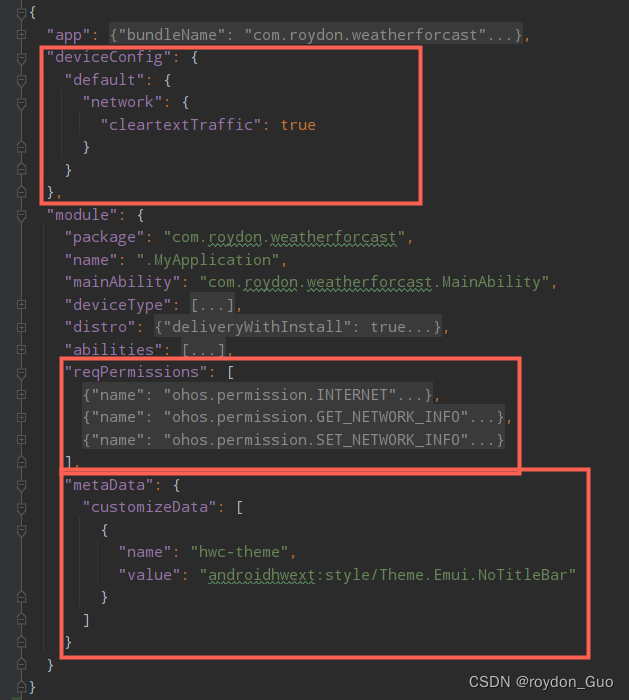
sdk为6版本,所以使用华为的远程模拟器p40即可。 1.2准备图片资源这里把天气预报用到的天气提示的图片全放在资源目录下的media文件下。 具体资源在github仓库已包含,自行前往。 1.3配置文件接着是修改配置文件,由于是发送网络请求请求api获取json天气数据,所以和安卓一样,需要修改配置文件,添加网络请求权限。 修改config.json,在module节点添加如下权限。 "reqPermissions": [ { "name": "ohos.permission.INTERNET" }, { "name": "ohos.permission.GET_NETWORK_INFO" }, { "name": "ohos.permission.SET_NETWORK_INFO" } ],接着还要配置http协议的api也能正常访问。在module和app同级添加如下。 "deviceConfig": { "default": { "network": { "cleartextTraffic": true } } },如果想要去除页面顶部的标题区域,接着添加如下配置。 "metaData": { "customizeData": [ { "name": "hwc-theme", "value": "androidhwext:style/Theme.Emui.NoTitleBar" } ] }最后添加完成预览: 天气api以前文章提到过,自行前往–>简易的安卓天气app(一)——解析Json数据、数据类封装 最后得到的api形式为: https://tianqiapi.com/api?version=v1&appid={your appid}&appsecret={your appsecret}其中appid和appsecret需要自行申请,免费版有请求上限。 此api会默认根据访问者ip的地理位置进行定位。又因为虚拟手机没法获取设备位置且本人没有华为设备,没法加入定位功能,,所以暂时在代码中指定需要查询的城市,,, 2.1NetworkUtil网络请求工具类,返回api获取的string字符串就行 public class NetworkUtil { /** * 18625561:27XjzrB7 * 67342285:5XgTk31r * 19267789:Dhu3DShY */ public static final String URL_WEATHER = "https://tianqiapi.com/api?version=v1&appid=67342285&appsecret=5XgTk31r"; public static String httpGet(String cityName) { String urlGetJson = URL_WEATHER + "&city=" + cityName; StringBuilder sb = new StringBuilder(); try { URL url = new URL(urlGetJson); HttpURLConnection connection = (HttpURLConnection) url.openConnection(); connection.setRequestMethod("GET"); connection.setReadTimeout(10000); connection.setConnectTimeout(10000); connection.connect(); BufferedReader reader = new BufferedReader(new InputStreamReader(connection.getInputStream())); String temp; while ((temp = reader.readLine()) != null) { sb.append(temp); } reader.close(); connection.disconnect(); } catch (Exception e) { e.printStackTrace(); return e.getMessage(); } return sb.toString(); } } 2.2测试网络请求为了保证主线程不受干扰,网络请求需要单独开辟一个异步线程请求数据。详情前往鸿蒙开发指南线程管理开发指导 创建一个异步线程:(使用lamda编程,不再new Runnable()实现 ) TaskDispatcher globalTaskDispatcher = getGlobalTaskDispatcher(TaskPriority.DEFAULT); globalTaskDispatcher.asyncDispatch(() -> { //网络请求,城市名指定即可,此处指定北京 //String result = NetworkUtil.httpGet(cityName); String result = NetworkUtil.httpGet("北京"); System.out.println(result); }成功获取数据:
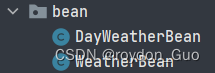
需要两个实体类封装数据:
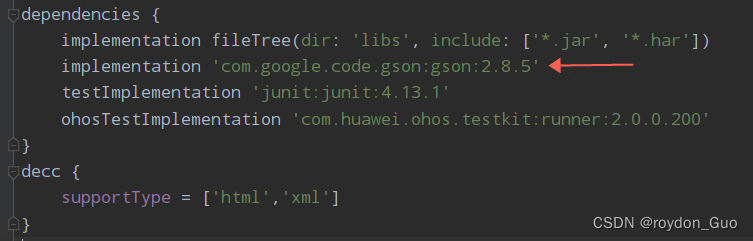
WeatherBean封装城市名称更新时间即可,其中还包含DayWeatherBean的数组存放七天天气。 DayWeatherBean就是七天的每一天的天气详情,每天的天气还包含24小时详细天气,本文不再详细探讨。 public class WeatherBean implements Serializable { @SerializedName("cityid") private String cityid; private String city;//城市名称 private String update_time;//更新时间 private List data;//获取今日天气,get[0] // get set toString。。。 } public class DayWeatherBean implements Serializable { @SerializedName("date") private String date; private String wea;//天气 private String wea_img;//天气图标 private String week;//周几 private String tem;//温度 //tv_tem_low_high=tem2+tem1拼接一起 private String tem2;//低温 private String tem1;//高温 //tv_win=win+win_speed private String[] win;//风力 private String win_speed;//风力等级 //tv_air=air+air_level+air_tips拼接一起 private String air;// private String air_level;// private String air_tips;// // @SerializedName("hours") // private List hoursWeatherBeanList; // @SerializedName("index") // private List mTipsBeans; // get set toString。。。 }封装数据使用Google的gson进行 首先引入gson依赖:打开build.gradle添加依赖,别忘了右上角Sync Now同步一下 implementation 'com.google.code.gson:gson:2.8.5'
对获取到的数据result进行封装:得到WeatherBean对象 Gson gson = new Gson(); WeatherBean weatherBean = gson.fromJson(result, WeatherBean.class);
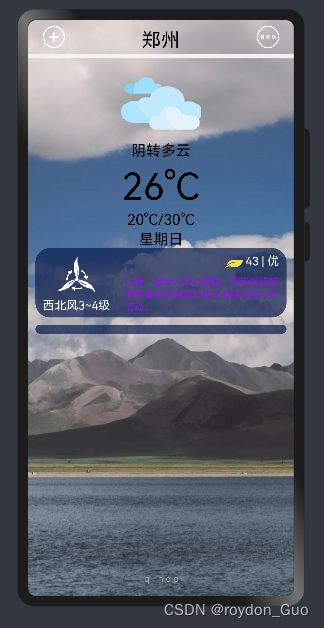
之后就是把数据渲染到ui上即可。 4.ui 4.1首页ui设计使用StackLayout把壁纸放在最下面一层,接着就是DirectionalLayout布局。 使用ScrollView组件包裹DirectionalLayout可以使布局上下滑动,超出屏幕布局可滑动屏幕查看。
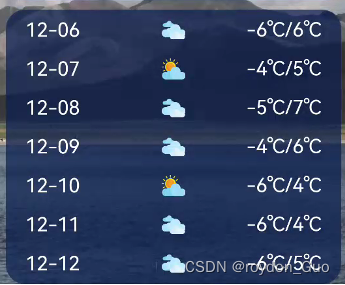
还包含一个ListContainer渲染未来七天天气数据。list_item的模板设计: 实现效果:
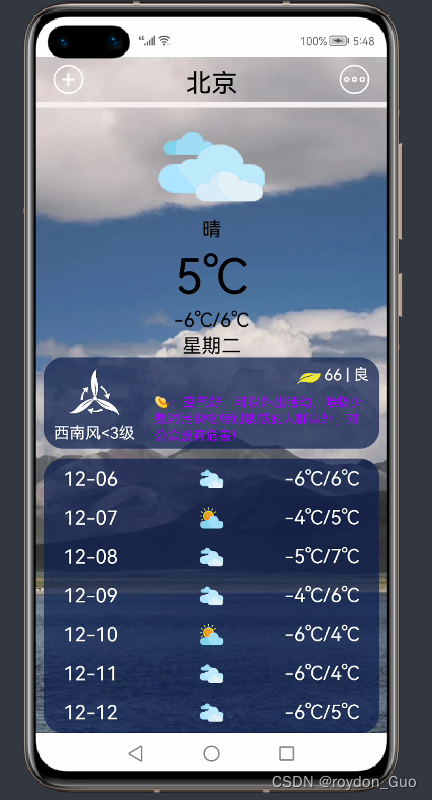
获取到api返回的数据后,把数据封装成实体类,其中wea_img属性接受一个string字符串,判断字符串的值返回对应图片资源的int整型。 package com.roydon.weatherforcast.utils; import com.roydon.weatherforcast.ResourceTable; public class WeatherImgUtil { public static int getImgResOfWeather(String weaStr) { int result = 0; switch (weaStr) { case "qing": result = ResourceTable.Media_weather_yin; break; case "yin": result = ResourceTable.Media_weather_yin; break; case "yu": result = ResourceTable.Media_weather_dayu; break; case "yun": result = ResourceTable.Media_weather_duoyun; break; case "bingbao": result = ResourceTable.Media_weather_leizhenyubingbao; break; case "wu": result = ResourceTable.Media_weather_wu; break; case "shachen": result = ResourceTable.Media_weather_shachenbao; break; case "lei": result = ResourceTable.Media_weather_leizhenyu; break; case "xue": result = ResourceTable.Media_weather_daxue; break; default: result = ResourceTable.Media_weather_qing; break; } return result; } } 4.3渲染数据组件全部注册好之后,封装一个渲染数据的方法。 public void dataShow(WeatherBean weatherBean) { if (weatherBean == null) { return; } city.setText(weatherBean.getCity()); DayWeatherBean dayWeather = weatherBean.getData().get(0);//当天天气 if (dayWeather == null) { return; } // 当天天气 weatherImg.setPixelMap(WeatherImgUtil.getImgResOfWeather(dayWeather.getWea_img())); weather.setText(dayWeather.getWea()); tem.setText(dayWeather.getTem()); temLowHigh.setText(dayWeather.getTem2() + "/" + dayWeather.getTem1()); week.setText(dayWeather.getWeek()); win.setText(dayWeather.getWin()[0] + dayWeather.getWin_speed()); air.setText(dayWeather.getAir() + " | " + dayWeather.getAir_level()); tips.setText("👒:" + dayWeather.getAir_tips()); // ListContainer展示未来七天天气 List dayWeatherBeanList = weatherBean.getData(); DayWeatherBeanProvider dayWeatherBeanProvider = new DayWeatherBeanProvider(dayWeatherBeanList, this); listContainer.setItemProvider(dayWeatherBeanProvider); }获取api数据与渲染ui独立封装一个方法: 其中渲染ui需要开辟ui异步线程getUITaskDispatcher().asyncDispatch() /** * GlobalTaskDispatcher 派发异步任务 */ public void getWeather(String cityName) { //网络请求 TaskDispatcher globalTaskDispatcher = getGlobalTaskDispatcher(TaskPriority.DEFAULT); globalTaskDispatcher.asyncDispatch(() -> { String result = NetworkUtil.httpGet(cityName); // System.out.println(result); Gson gson = new Gson(); WeatherBean weatherBean = gson.fromJson(result, WeatherBean.class); if (weatherBean == null) { getUITaskDispatcher().asyncDispatch(() -> { ToastUtil.showToast(this, "貌似出了点问题~"); }); } else { System.out.println(weatherBean); getUITaskDispatcher().asyncDispatch(() -> { ToastUtil.showToast(this, weatherBean.getCity() + "天气更新"); dataShow(weatherBean); }); } }); } 4.3.1ListContainer跟安卓一样,也是需要适配器。用来渲染哪个模板,并把数据渲染到模板。 ①新建provider包,包中新建DayWeatherBeanProvider适配器继承自BaseItemProvider。 ②重写BaseItemProvider中的方法,鼠标悬停会提示。 @Override public int getCount() { return list == null ? 0 : list.size(); } @Override public Object getItem(int i) { if (list != null && i >= 0 && i //可添加具体处理逻辑 return i; } Override public Component getComponent(int i, Component component, ComponentContainer componentContainer) { return null; }③添加数据集合List与AbilitySlice,并创建构造方法。 private List list; private AbilitySlice slice; public DayWeatherBeanProvider(List list, AbilitySlice slice) { this.list = list; this.slice = slice; }④重写getComponent(),渲染模板 @Override public Component getComponent(int i, Component component, ComponentContainer componentContainer) { final Component cpt; if (component == null) { cpt = LayoutScatter.getInstance(slice).parse(ResourceTable.Layout_item_day_weather, null, false); } else { cpt = component; } DayWeatherBean dayWeatherBean = list.get(i); Text date = (Text) cpt.findComponentById(ResourceTable.Id_text_date); Text tem = (Text) cpt.findComponentById(ResourceTable.Id_text_tem_low_high); Image image = (Image) cpt.findComponentById(ResourceTable.Id_day_weather_img); date.setText(dayWeatherBean.getDate().substring(5,10)); image.setPixelMap(WeatherImgUtil.getImgResOfWeather(dayWeatherBean.getWea_img())); tem.setText(dayWeatherBean.getTem2() + "/" + dayWeatherBean.getTem1()); return cpt; } 官方开发文档见下方链接ListContainer如果非得想加入每小时天气数据展示,可前往简易的安卓天气app(二)——适配器、每小时数据展示。 折线图设计可参考安卓WeatherForcast4。 最终效果:
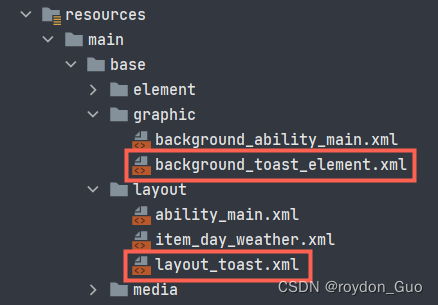
自定义Toast弹框鸿蒙开发指南也为我们提供好了。详情前往鸿蒙开发指南ToastDialog。 此处封装一个带图片的Toast工具类。渲染时需要开辟ui异步线程。 getUITaskDispatcher().asyncDispatch(() -> { ToastUtil.showToast(this, weatherBean.getCity() + "天气更新"); });新建两个xml,一个是布局设置主要样式,一个是ui美化设置圆角与背景 layout_toast.xml background_toast_element.xml ToastUtil: 先加载layout_toast布局文件把渲染的消息放进去然后让new出来的ToastDialog加载布局即可。 public class ToastUtil { /** * @param context 上下文参数 * @param msg 内容 */ public static void showToast(Context context, String msg) { DirectionalLayout layout = (DirectionalLayout) LayoutScatter.getInstance(context) .parse(ResourceTable.Layout_layout_toast, null, false); Text msg_toast = layout.findComponentById(ResourceTable.Id_msg_toast); msg_toast.setText(msg); new ToastDialog(context) .setContentCustomComponent(layout) .setSize(DirectionalLayout.LayoutConfig.MATCH_CONTENT, DirectionalLayout.LayoutConfig.MATCH_CONTENT) .setAlignment(LayoutAlignment.TOP) .show(); } public static void showTips(Context context, String msg) { new ToastDialog(context).setText(msg).setAlignment(LayoutAlignment.TOP).show(); } } 5.Github源码源码地址:WeatherDemo 视star情况更新。 |


【本文地址】