| PaddleOCR在地平线旭日X3派上的部署和测试(Python版本和C++版本) | 您所在的位置:网站首页 › 地平线42004版本 › PaddleOCR在地平线旭日X3派上的部署和测试(Python版本和C++版本) |
PaddleOCR在地平线旭日X3派上的部署和测试(Python版本和C++版本)
|
C++还在测试未更新,当前博客仅支持python版本
参考:PaddleOCR在地平线旭日X3派上的部署和测试--金书世界 测试的模型、文件、模型转换工具和系统下载参见百度网盘(文件下载后可以直接使用无需自己搭建模型转换的环境,板端测试程序放置到板端就可以运行无需修改测试,需要的基础环境和基础测试全部打包) https://pan.baidu.com/s/1Vhu_iYkO5rfB8008WzwLFw?pwd=usyt 提取码:usyt
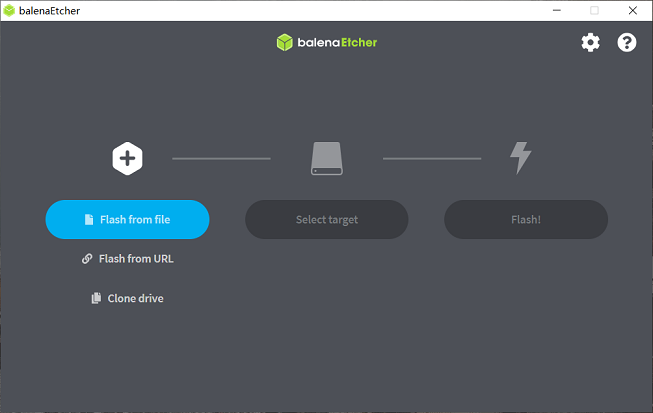
虚拟机:虚拟机文件下载后参考说明文档打开后就可以直接使用。 文件:保存虚拟机内的所有文件,可以复制文件到自己的虚拟机,但是需要自己搭建测试环境。 X3镜像文件:地平线的官方ubuntu系统文件。 板端测试程序:det的检测程序和demo的检测识别程序(pyton版本) 测试系统的制作参靠官方网址 https://developer.horizon.cc/documents_rdk/installation/install_os 本测试使用的系统放置在百度网盘中(解压后使用) 链接:https://pan.baidu.com/s/1whCbIRQ6w-XlCeu8JQkauw?pwd=mu6w 提取码:mu6w 下载制作工具:balenaEtcher - Flash OS images to SD cards & USB drives 打开balenaEtcher工具,点击Flash frome file按钮,选择解压出来的ubuntu-preinstalled-desktop-arm64.img文件作为烧录镜像
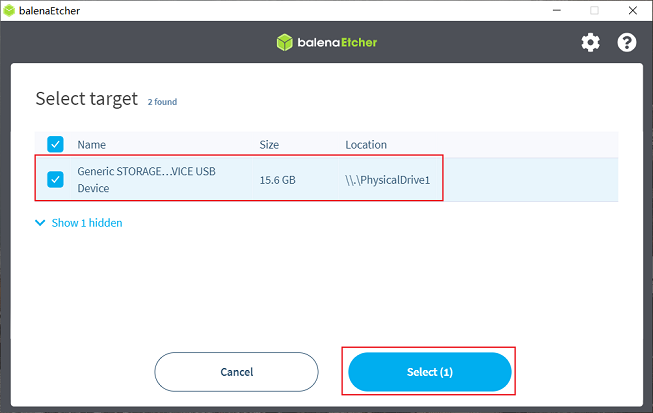
点击Select target按钮,选择对应的Micro SD存储卡作为目标存储设备
点击Flash按钮开始烧录,待工具提示Flash Complete时,表示镜像烧录完成,可以关闭balenaEtcher并取出存储卡
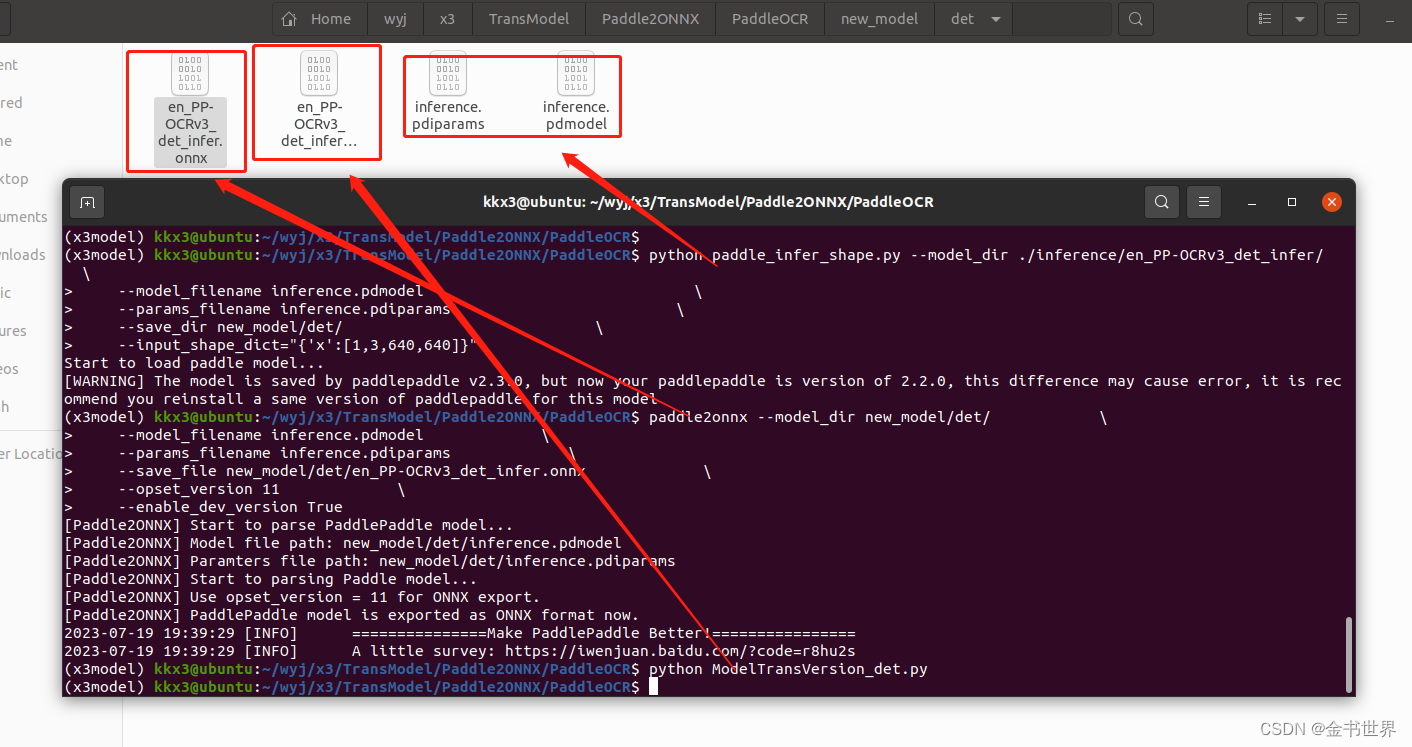
rec模型转换 输出的rec模型路径 /home/kkx3/wyj/x3/TransModel/Paddle2ONNX/PaddleOCR/new_model/rec模型转换
输出的det模型路径 /home/kkx3/wyj/x3/TransModel/Paddle2ONNX/PaddleOCR/new_model/det由于x3派支持的版本限制需要降低onnx版本,左侧原版,右侧是降低版本后的,将降低后的复制到onnx模型转x3派的路径下进行模型转换。
修改配置文件01_check.sh 配置上述上述步骤中生成的降低onnx版本后的onnx模型
执行脚本 #运行 bash 01_check.sh运行结果
修改维度 /home/kkx3/wyj/x3/TransModel/horizon_model_convert_sample/04_detection/10_LED/mapper/preprocess.py
修改配置文件02_preprocess.sh
执行脚本 #运行 bash 02_preprocess.sh运行结果
修改配置文件03_build.sh和ocr_config.yaml
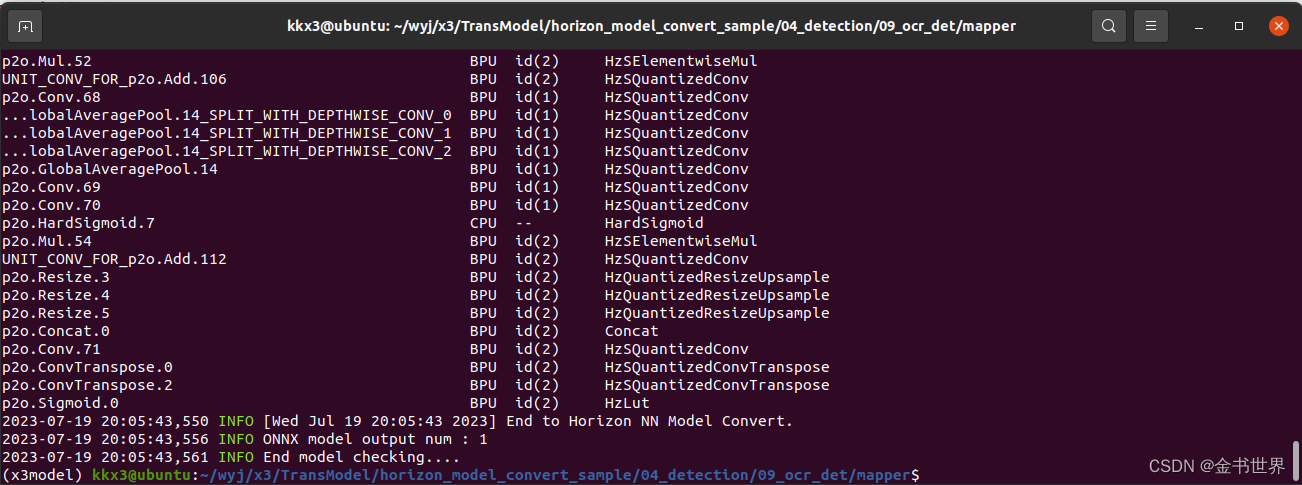
配置输入输出的模型路径和模型的名称 运行 #运行 bash 03_build.sh运行结果
输出模型的路径 /home/kkx3/wyj/x3/TransModel/horizon_model_convert_sample/04_detection/09_ocr_det/mapper/model_output修改配置文件04_inference.sh 配置测试的模型和图片的路径
运行 #运行 bash 04_inference.sh运行结果
结果图片保存路径 /home/kkx3/wyj/x3/TransModel/horizon_model_convert_sample/04_detection/09_ocr_det/mapper/ocr_det_result.png
左侧书输入的图像右侧是输出的解雇图片,白色的位置表示检测到的问题。 rec模型转换 #进入到指定的测试路径 cd /home/kkx3/wyj/x3/TransModel/horizon_model_convert_sample/04_detection/09_ocr_rec/mapper #激活虚拟环境 conda activate x3model
修改配置文件01_check.sh 配置上述上述步骤中生成的降低onnx版本后的onnx模型
执行脚本 #运行 bash 01_check.sh运行结果 修改配置文件02_preprocess.sh
执行脚本 #运行 bash 02_preprocess.sh运行结果
修改配置文件03_build.sh和ocr_config.yaml
运行 #运行 bash 03_build.sh运行结果
输出模型的路径 /home/kkx3/wyj/x3/TransModel/horizon_model_convert_sample/04_detection/09_ocr_rec/mapper/model_output修改配置文件04_inference.sh 配置测试的模型和图片的路径
运行 #运行 bash 04_inference.sh运行结果
进入指定的路径并激活虚拟环境 cd /home/kkx3/wyj/x3/TransModel/horizon_model_convert_sample/04_detection/09_ocr_demo/mapper conda activate x3model
修改配置文件04_inference.sh
运行 bash 04_inference.sh运行结果
测试图片
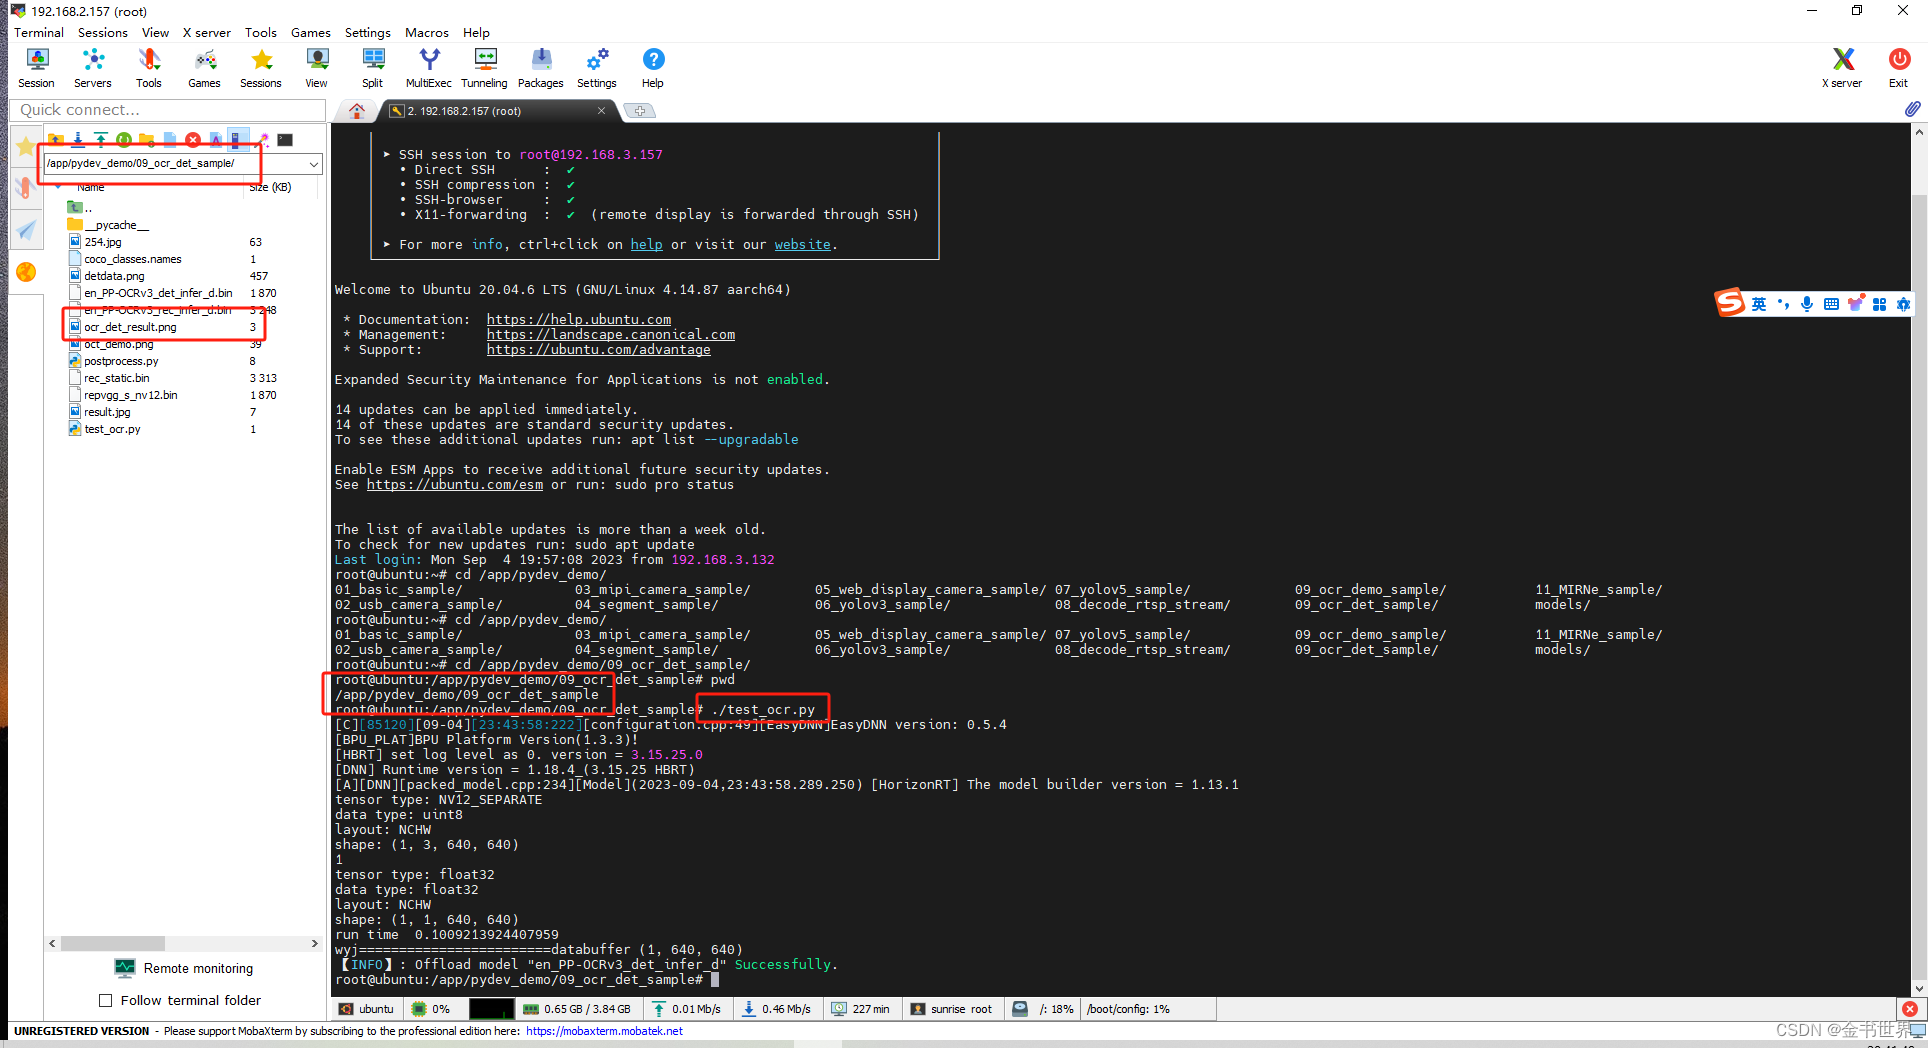
复制模型到板端运行 cd /app/pydev_demo/09_ocr_det_sample ./test_ocr.py测试结果
测试结果保存在当前的文件夹
复制模型到板端运行 cd /app/pydev_demo/09_ocr_demo_sample ./test_ocr.py测试结果
|


 配置输入输出的模型路径和模型的名称


【本文地址】