| 当NestJS遇上Next.js | 您所在的位置:网站首页 › 从Nextjs到服务端渲染的学习 › 当NestJS遇上Next.js |
当NestJS遇上Next.js
|
当NestJS遇上Next.js发布时间:2021-01-04 22:55:01阅读:(6500) Nest (NestJS) 是一个用于构建高效、可扩展的Node.js服务器端应用程序的开发框架。它利用 JavaScript 的渐进增强的能力,使用并完全支持TypeScript(仍然允许开发者使用纯 JavaScript 进行开发),并结合了 OOP (面向对象编程)、FP (函数式编程)和 FRP (函数响应式编程)。 Next.js是一个可用于生产环境的服务端渲染框架。 (ps:这两个框架名字长得还真像,可千万别搞错了) NestJS更专注一服务端,而Next.js更专注也页面的渲染,如果将这两个框架结合在一起,岂不是完美?本文将介绍如何将这两个框架整合到一起使用。 初始化首先,我们使用Nest-cli来初始化项目 nest new nest-next等初始化完成,我们可以看到项目结构如下: 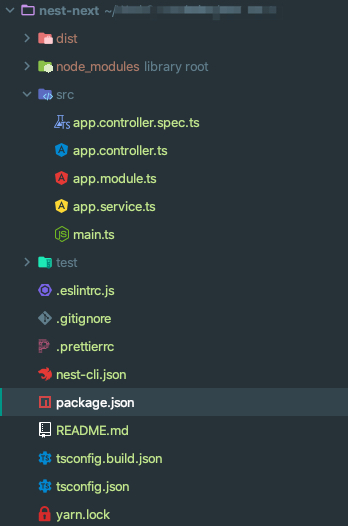 我们把项目跑起来,执行:yarn start,nest默认启动端口为3000,我们打开浏览器就能开到初始页面了 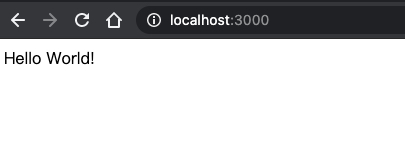 安装Next.js相关依赖yarn add next react react-domyarn add cross-env ts-node-dev ts-node @types/react --dev初始化Next.js相关配置 安装Next.js相关依赖yarn add next react react-domyarn add cross-env ts-node-dev ts-node @types/react --dev初始化Next.js相关配置一、在项目根目录下创建pages文件夹,这是next默认存在页面的文件夹 二、在pages文件夹下创建第一个页面 /* index.tsx */import React from 'react'; const Index = () => ( 这是Next渲染的压面 ) export default Index; 三、在src目录下创建一个next文件夹,next相关的配置都会放在这里 创建一个service /* next.service.ts */import { IncomingMessage, ServerResponse} from 'http'; export class NextService{ private app!: any; public getApp(): any { return this.app; } public setApp(app: any):void { this.app = app; } public async render(page:string, req:IncomingMessage, res: ServerResponse):Promise public async render(page:string, data: any, req:IncomingMessage, res: ServerResponse):Promise public async render(page: string, arg2: any, arg3: any, arg4?: any):Promise { if(NextService.isIncomingMessage(arg2)){ await this.app.render(arg2, arg3, page); }else{ await this.app.render(arg3, arg4, page, arg2); } } private static isIncomingMessage(arg:any):arg is IncomingMessage{ return typeof arg.httpVersion === 'string'; }} 创建一个middleware /* next.middleware.ts */import {Injectable, NestMiddleware} from '@nestjs/common';import { IncomingMessage, ServerResponse} from 'http';import {NextService} from './next.service';@Injectable()export class NextMiddleware implements NestMiddleware{ constructor( private readonly next: NextService ) {} public use(req: IncomingMessage, res: ServerResponse) { const handle = this.next.getApp().getRequestHandler(); handle(req, res); }} 创建一个module /* next.module.ts */import {Module} from '@nestjs/common';import {NextService} from './next.service';import next from 'next';import {ServerConstructor} from 'next/dist/next-server/server/next-server'; type NextServerConstructor = Omit & { dev?: boolean} @Module({ providers: [NextService], exports: [ NextService ]})export class NextModule{ constructor( private readonly next: NextService ) {} public async prepare(options?: NextServerConstructor) { const app = next(Object.assign({ dev: process.env.NODE_ENV !== 'production', dir: process.cwd(), }, options || {})); return app.prepare().then(()=>this.next.setApp(app)); }} 将NextModule注入到Nest中,我们来修改src/app.module.ts文件 /* app.module.ts */import { MiddlewareConsumer, Module, RequestMethod } from '@nestjs/common';import { AppController } from './app.controller';import { AppService } from './app.service';import { NextModule } from './next/next.module';import { NextMiddleware } from './next/next.middleware';@Module({ imports: [NextModule], // 这里添加NextModule controllers: [AppController], providers: [AppService],})export class AppModule { public configure(consumer: MiddlewareConsumer) { AppModule.handleAssets(consumer); } // 注意:这里很重要,_next*是nextjs静态资源请求的前缀,这里这么处理是将静态资源相关的请求由Nest转交个Next处理 private static handleAssets(consumer: MiddlewareConsumer):void { consumer.apply(NextMiddleware) .forRoutes({ path: '_next*', method: RequestMethod.GET }) }} 修改入口文件main.ts /* main.ts */import { NestFactory } from '@nestjs/core';import { AppModule } from './app.module';import { NextModule } from './next/next.module';async function bootstrap() { const app = await NestFactory.create(AppModule); // 使next初始化 await app.get(NextModule).prepare().then(()=>{ app.listen(3000); })}bootstrap(); 修改controller,上面的配置只将静态资源转交给了Next处理,页面请求还没有转交,所以我们在controller中将所需的页面进行转交 /* app.controller.ts */import { Controller, Get, Req, Res } from '@nestjs/common';import { NextService } from './next/next.service';import {Request, Response} from 'express';@Controller()export class AppController { constructor( private readonly next: NextService ) {} @Get() getHello(@Req() req:Request, @Res() res: Response) { // 把原本由Nest处理的主页转交给next return this.next.render("/index", req, res); }} 至此,代码层面的修改已经完成了,然后修改一下配置文件 /* tsconfig.json */{ "compilerOptions": { "jsx": "preserve", "target": "ESNext", "module": "ESNext", "lib": [ "dom", "dom.iterable", "esnext" ], "moduleResolution": "Node", "declaration": true, "removeComments": true, "emitDecoratorMetadata": true, "experimentalDecorators": true, "allowSyntheticDefaultImports": true, "sourceMap": true, "outDir": "./dist", "baseUrl": "./", "incremental": true, "allowJs": true, "skipLibCheck": true, "strict": false, "forceConsistentCasingInFileNames": true, "noEmit": true, "esModuleInterop": true, "resolveJsonModule": true, "isolatedModules": true }, "include": [ "next-env.d.ts", "**/*.ts", "**/*.tsx" ], "exclude": [ "node_modules" ]}新增一个tsconfig.server.json /* tsconfig.server.json */{ "extends": "./tsconfig.json", "compilerOptions": { "module": "CommonJS", "noEmit": false }, "include": [ "src" ]}在package.json的script添加一条启动命令(默认使用nest启动无法编译react,所以直接使用node启动) /* package.json */{ ... "scripts": { "dev": "cross-env tsnd --project tsconfig.server.json --ignore-watch .next --cls src/main.ts", ... }}然后我们来启动项目 yarn dev等项目启动完成,再回到浏览器中刷新下页面,看到如下界面,说明NestJS与Next.js集成完成了 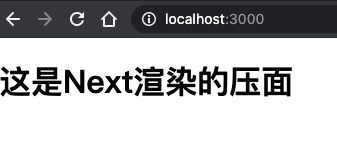 本文源代码:Gitee、Github 标签:seonext.jsReactNestJS文章版权及转载声明:文章转载或复制请以超链接形式并注明出处陌上小筑 赞(3)打赏上一篇:create-react-app扩展webpack配置 下一篇:Spring boot 2.4.2 redisson报错问题排查 发表评论评论列表(有0条评论,6500人围观)暂无评论 |
【本文地址】
| 今日新闻 |
| 推荐新闻 |
| 专题文章 |