| STM32控制电机简易教程 | 您所在的位置:网站首页 › stm32伺服电机驱动 › STM32控制电机简易教程 |
STM32控制电机简易教程
|
STM32控制电机简易教程 包教包会
近期,电赛临近,来补习一下电机的使用方式,使用起来非常的方便
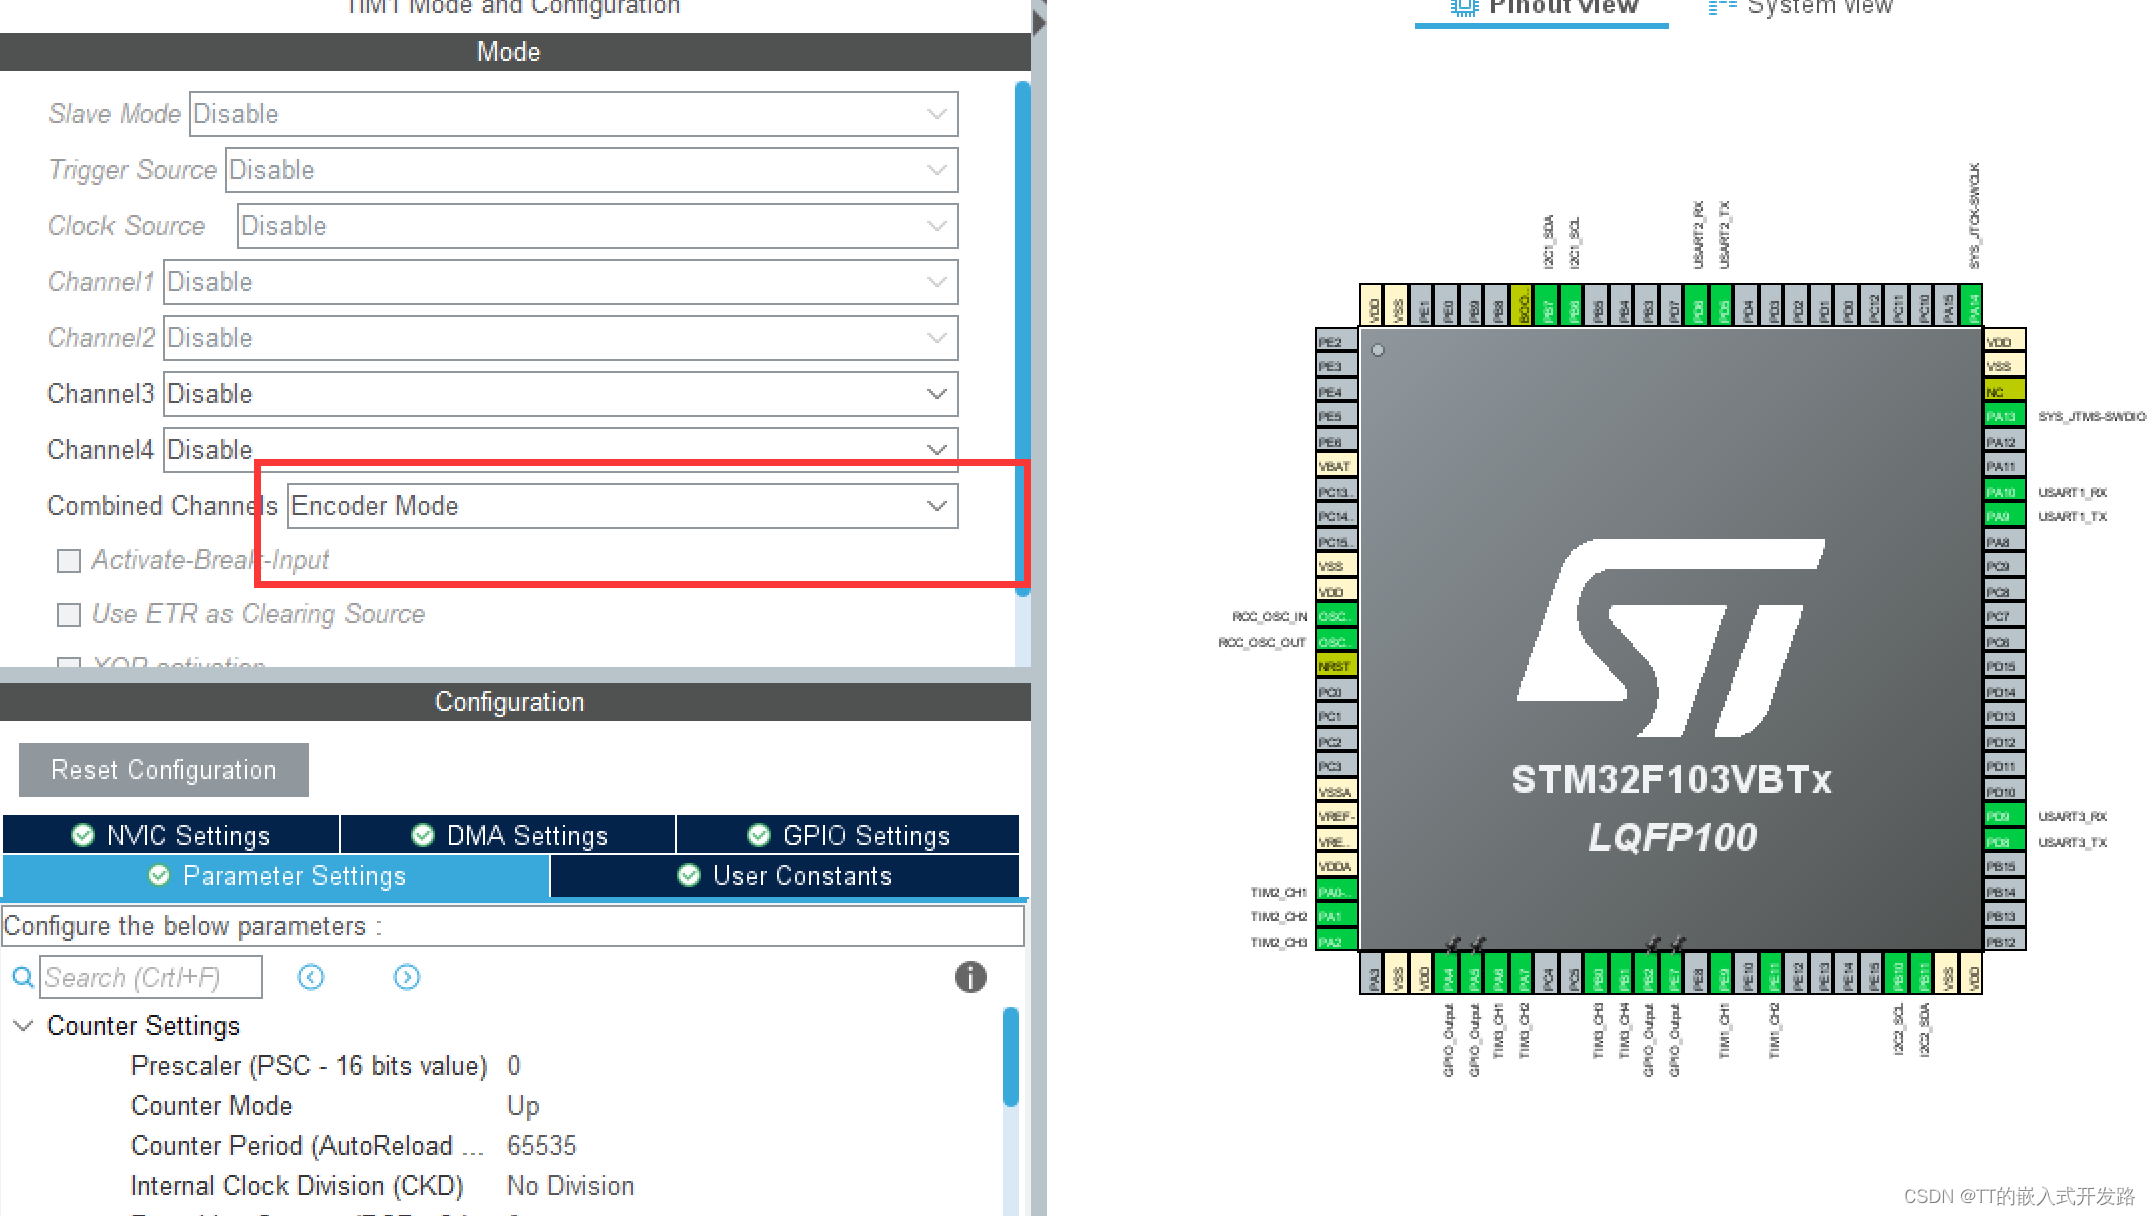
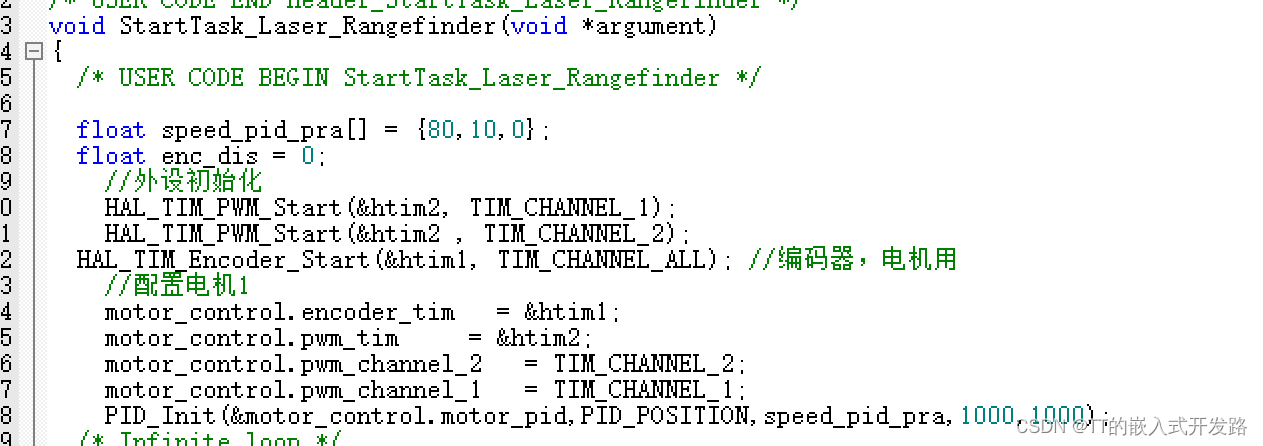
首先是在CUBEMX里面配置一些基本内容 其他的时钟和调试配置就不多说了。 然后就是初始化了 初始化 float speed_pid_pra[] = {80,10,0}; float enc_dis = 0; //外设初始化 HAL_TIM_PWM_Start(&htim2, TIM_CHANNEL_1); HAL_TIM_PWM_Start(&htim2 , TIM_CHANNEL_2); HAL_TIM_Encoder_Start(&htim1, TIM_CHANNEL_ALL); //编码器,电机用 //配置电机1 motor_control.encoder_tim = &htim1; motor_control.pwm_tim = &htim2; motor_control.pwm_channel_2 = TIM_CHANNEL_2; motor_control.pwm_channel_1 = TIM_CHANNEL_1; PID_Init(&motor_control.motor_pid,PID_POSITION,speed_pid_pra,1000,1000);我使用的是RZ7899作为电机驱动,所以配置了两个PWM,如果使用L298N的话,可以自行更改,难度不大,如遇问题可以私信我。 然后就是开始闭环控制电机了 tim_get_encoder(&motor_control); PID_calc(&motor_control.motor_pid,motor_control.speed_feedback,motor_control.speed_set); motor_set_pwm(&motor_control); enc_dis = 100 * motor_control.mileage_sum;//要用距离累计使用 motor_control.mileage_sum = 0;相关函数 void tim_get_encoder(motor_control_t *motor) { static s16 encoder = 0; static float delta = 0; motor->direction = __HAL_TIM_IS_TIM_COUNTING_DOWN(motor->encoder_tim); encoder = htim1.Instance->CNT; delta = (float)encoder * PI * WHEEL_DIAM/ (CIRCLE_CNT * 4 * GEAR_RATIO); motor->speed_feedback = 1000 * delta / TASK_CYCLE; motor->mileage_sum += delta; __HAL_TIM_SET_COUNTER(motor->encoder_tim,0); motor->angel = htim1.Instance->CNT/CIRCLE_CNT *360;; motor->angel += motor->angel; if(motor->angel >= 360) motor->angel = 0; htim1.Instance->CNT = 0; } void motor_set_pwm(motor_control_t *motor) { if(motor->motor_pid.out > 0) { htim2.Instance->CCR1 = my_fabs(motor->motor_pid.out); htim2.Instance->CCR2 = 0; } else { htim2.Instance->CCR2 = my_fabs(motor->motor_pid.out); htim2.Instance->CCR1 = 0; } }宏定义 #define CIRCLE_CNT 11 //编码器线数 #define GEAR_RATIO 50.0f //减速比 #define WHEEL_DIAM 2.0f //轮子直径,cm #define TASK_CYCLE 10 //控制周期,ms
作者联系方式: QQ:488628560 |
 然后是使用PWM去调速
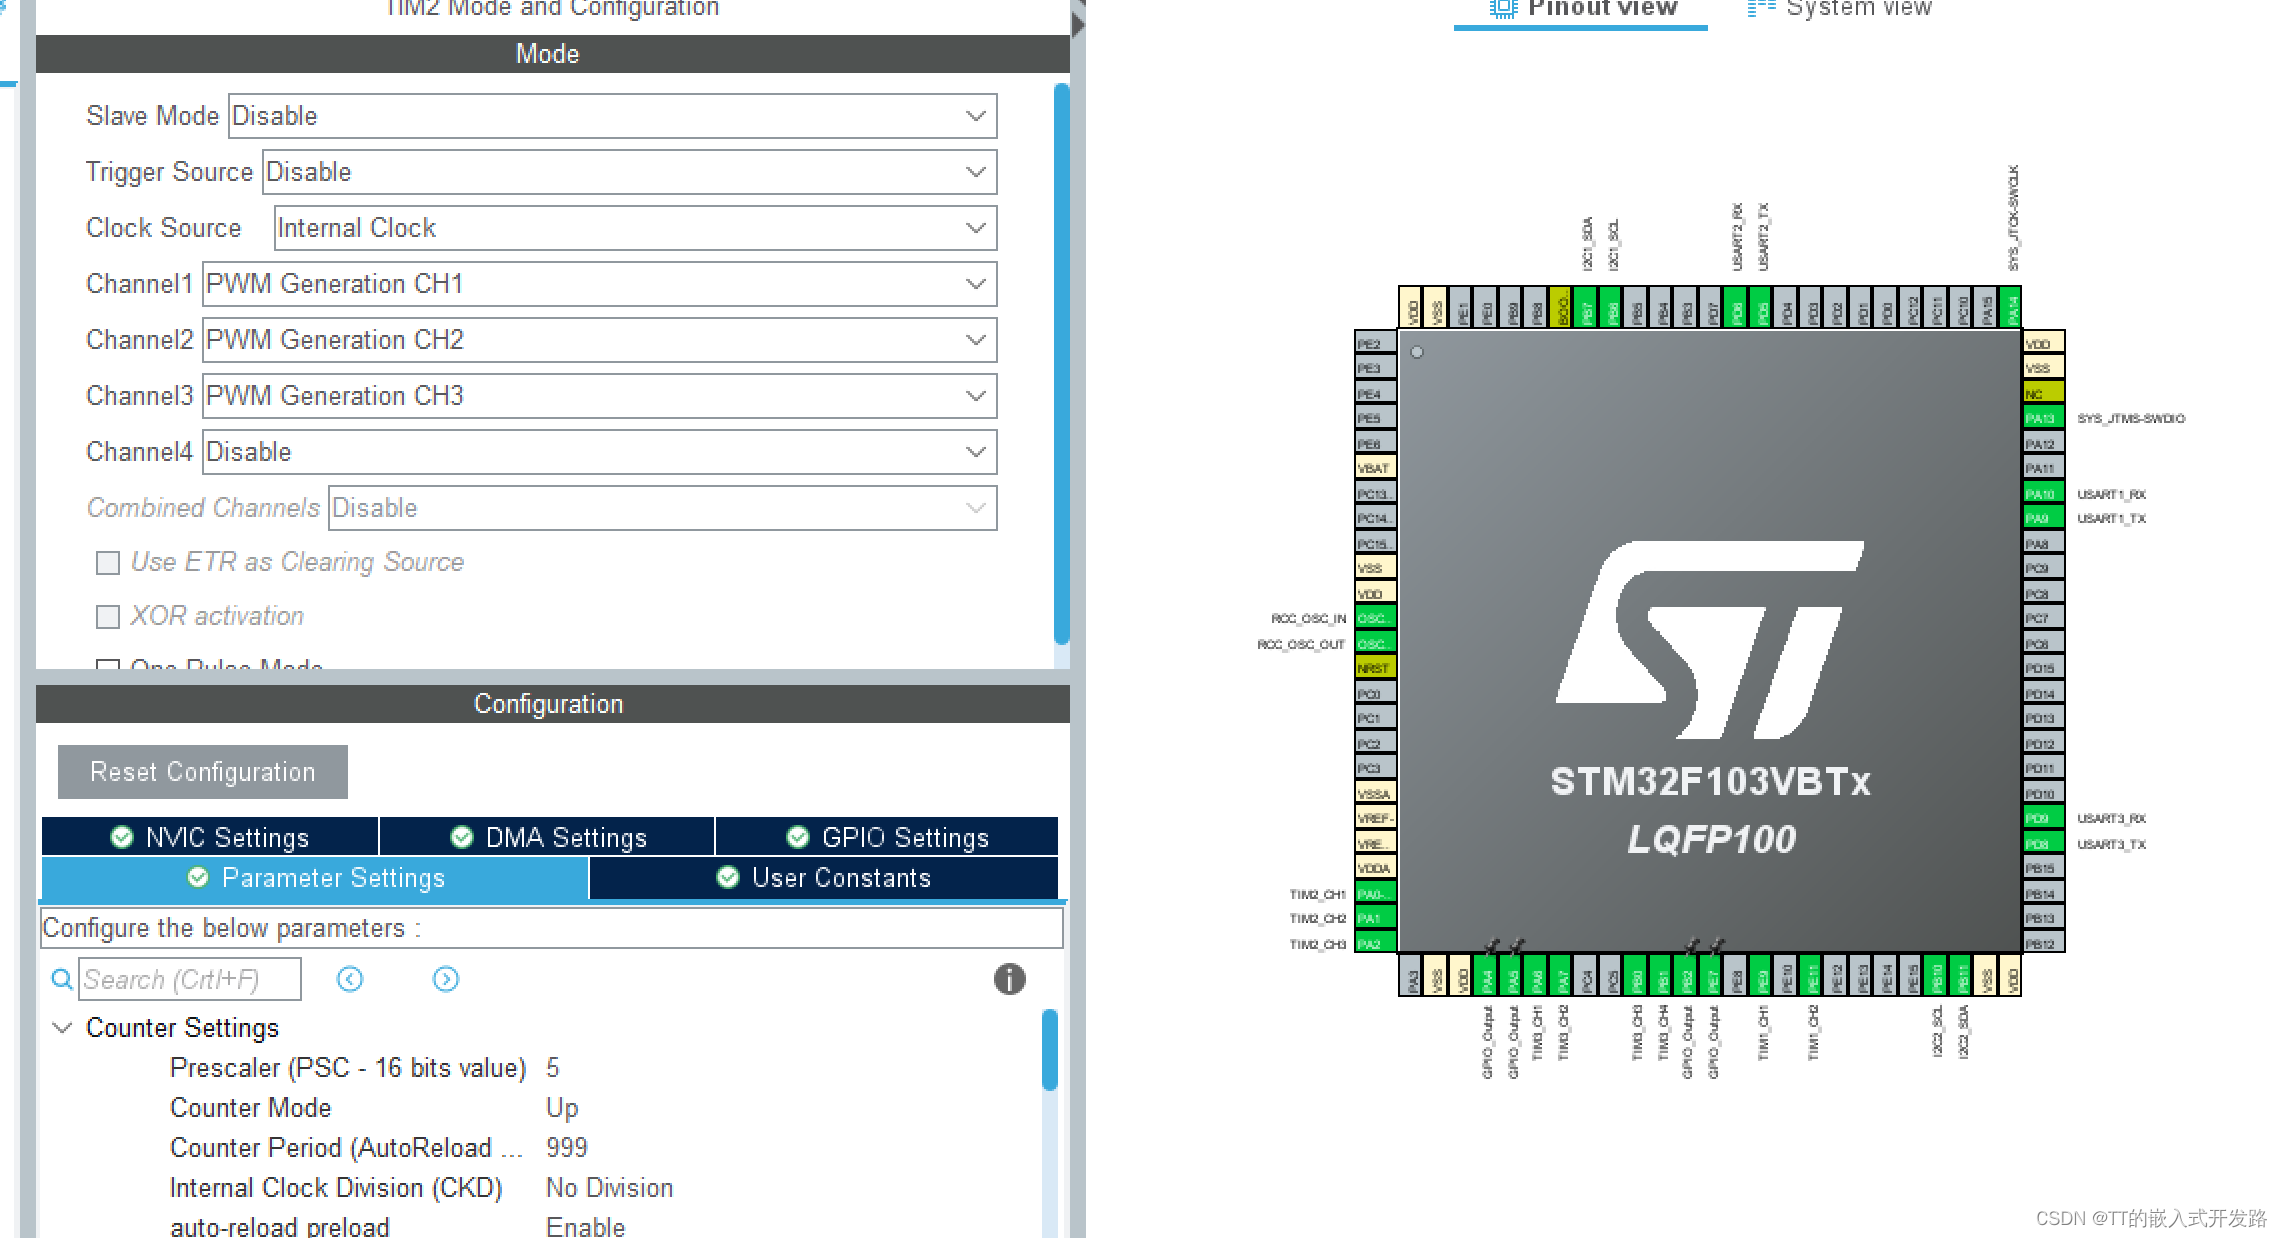
 同样的,这里使用的是结构体,
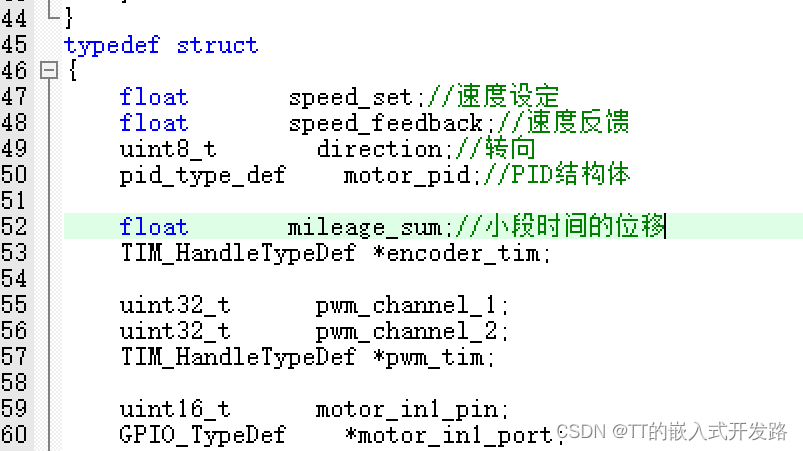
【本文地址】
公司简介
联系我们