| 怎么用Springboot+vue实现图片上传至数据库并显示 | 您所在的位置:网站首页 › 上传文件图片头像配置静态资源路径static › 怎么用Springboot+vue实现图片上传至数据库并显示 |
怎么用Springboot+vue实现图片上传至数据库并显示
|
一、前端设置 前端是Vue + Element-UI 采用el-upload组件(借鉴官方)上传图片: action在这里可以随便设置,因为在后面有 :http-request 去自己设置请求,注意由于是自己写请求需要 :auto-upload=“false” ,并且由于是前后端连接要解决跨域问题,所以在 $hostURL+imageUrl 定义了一个全局变量: //在main.js中 Vue.prototype.$hostURL='http://localhost:8082'登录后复制在methods中: methods:{ //这里是官方的方法不变 handleAvatarSuccess(res, file){ this.imageUrl = URL.createObjectURL(file.raw); }, beforeAvatarUpload(file) { const isJPG = file.type === 'image/jpeg'; const isLt2M = file.size / 1024 / 1024 < 2; if (!isJPG) { this.$message.error('上传头像图片只能是 JPG 格式!'); } if (!isLt2M) { this.$message.error('上传头像图片大小不能超过 2MB!'); } return isJPG && isLt2M; }, //这里是自定义发送请求 picUpload(f){ let params = new FormData() //注意在这里一个坑f.file params.append("file",f.file); this.$axios({ method:'post', //这里的id是我要改变用户的ID值 url:'/setimg/'+this.userForm.id, data:params, headers:{ 'content-type':'multipart/form-data' } }).then(res=>{ //这里是接受修改完用户头像后的JSON数据 this.$store.state.menu.currentUserInfo=res.data.data.backUser //这里返回的是头像的url this.imageUrl = res.data.data.backUser.avatar }) }, //触发请求 submitUpload(){ this.$refs.upload.submit(); } }登录后复制在上面代码中有一个坑 f.file ,我看了许多博客,发现有些博客只有 f 没有 .file 导致出现401、505错误。 二、后端代码1.建立数据库
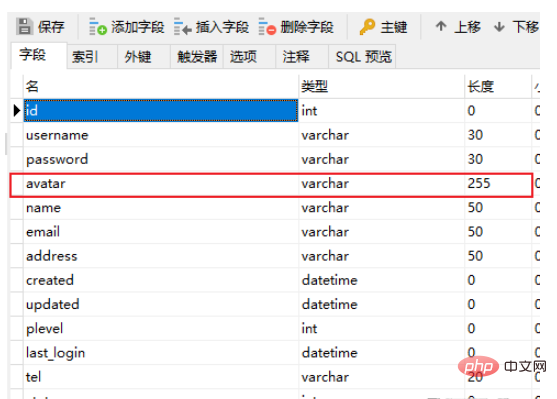
这里头像avatar是保存的上传图片的部分url 2.实体类、Mapper实体类: 采用mybatis plus @Data public class SysUser extends BaseEntity{ //这里的BaseEntity是id,statu,created,updated数据 private static final Long serialVersionUID = 1L; @NotBlank(message = "用户名不能为空") private String username; // @TableField(exist = false) private String password; @NotBlank(message = "用户名称不能为空") private String name; //头像 private String avatar; @NotBlank(message = "邮箱不能为空") @Email(message = "邮箱格式不正确") private String email; private String tel; private String address; @TableField("plevel") private Integer plevel; private LocalDateTime lastLogin; }登录后复制@Mapper @TableName("sys_user") public interface SysUserMapper extends BaseMapper { }登录后复制3.接受请求,回传数据 @Value("${file.upload-path}") private String pictureurl; @PostMapping("/setimg/{id}") public Result setImg(@PathVariable("id") Long id, @RequestBody MultipartFile file){ String fileName = file.getOriginalFilename(); File saveFile = new File(pictureurl); //拼接url,采用随机数,保证每个图片的url不同 UUID uuid = UUID.randomUUID(); //重新拼接文件名,避免文件名重名 int index = fileName.indexOf("."); String newFileName ="/avatar/"+fileName.replace(".","")+uuid+fileName.substring(index); //存入数据库,这里可以加if判断 SysUser user = new SysUser(); user.setId(id); user.setAvatar(newFileName); sysUserMapper.updateById(user); try { //将文件保存指定目录 file.transferTo(new File(pictureurl + newFileName)); } catch (Exception e) { e.printStackTrace(); } System.out.println("保存成功"); SysUser ret_user = sysUserMapper.selectById(user.getId()); ret_user.setPassword(""); return Result.succ(MapUtil.builder() .put("backUser",ret_user) .map()); }登录后复制yml文件中图片的保存地址: file: upload-path: D:\Study\MyAdmin\scr登录后复制三、显示图片1.后端配置实现前端Vue :scr 更具url显示头像图片,则必须设置WebMVC中的静态资源配置 建立WebConfig类 @Configuration public class WebConfig implements WebMvcConfigurer{ private String filePath = "D:/Study/MyAdmin/scr/avatar/"; @Override public void addResourceHandlers(ResourceHandlerRegistry registry) { registry.addResourceHandler("/avatar/**").addResourceLocations("file:"+filePath); System.out.println("静态资源获取"); } }登录后复制这样就可是显示头像图片了 2.前端配置注意跨域问题以及前面的全局地址变量 vue.config.js文件(若没有则在scr同级目录下创建): module.exports = { devServer: { // 端口号 open: true, host: 'localhost', port: 8080, https: false, hotOnly: false, // 配置不同的后台API地址 proxy: { '/api': { //后端端口号 target: 'http://localhost:8082', ws: true, changOrigin: true, pathRewrite: { '^/api': '' } } }, before: app => {} } }登录后复制main.js: axios.defaults.baseURL = '/api'登录后复制以上就是怎么用Springboot+vue实现图片上传至数据库并显示的详细内容,更多请关注php中文网其它相关文章! |
【本文地址】
公司简介
联系我们