| Seaborn中文教程 | 您所在的位置:网站首页 › seaborn库安装anaconda › Seaborn中文教程 |
Seaborn中文教程
|
章节概要
Seaborn介绍:
安装Seaborn
加载库和数据文件
Seaborn的绘图功能
用Matplotlib定制
Pandas的作用
Seaborn 主题
调色盘
图形重叠
融合数据
迷你画廊
安装Seaborn
首先确定你的电脑已安装以下应用 Python 2.7+ or Python 3 Pandas Matplotlib Seaborn Jupyter Notebook(可选)打开Jupyter Notebook, 过几秒钟会弹出网页窗口Home。
Seaborn属于Matplotlib的一个高级接口,为我们进行数据的可视化分析提供了极大的方便。 加载库和数据文件加载pandas、matplotlib、seaborn。 # coding: utf-8 #加载pandas import pandas as pd #加载matplotlib from matplotlib import pyplot as plt #在notebook中显示数据点 %matplotlib inline #加载seaborn import seaborn as sb这里提供了一个数据文件,下载链接为 Pokemon.csv 用pandas读取数据文件,并显示前五行。 #用pandas读取Pokemon.csv df = pd.read_csv("f:/Pokemon.csv", encoding = "unicode_escape") #读取前五行,编译后的结果为一个列表。 df.head() # Name Type 1 Type 2 Total HP Attack Defense Sp. Atk Sp. Def Speed Stage Legendary 0 1 Bulbasaur Grass Poison 318 45 49 49 65 65 45 1 False 1 2 Ivysaur Grass Poison 405 60 62 63 80 80 60 2 False 2 3 Venusaur Grass Poison 525 80 82 83 100 100 80 3 False 3 4 Charmander Fire NaN 309 39 52 43 60 50 65 1 False 4 5 Charmeleon Fire NaN 405 58 64 58 80 65 80 2 False #绘制散点图 sb.lmplot(x = 'Attack', y = 'Defense', data = df) D:\Function\Anaconda3\lib\site-packages\scipy\stats\stats.py:1713: FutureWarning: Using a non-tuple sequence for multidimensional indexing is deprecated; use `arr[tuple(seq)]` instead of `arr[seq]`. In the future this will be interpreted as an array index, `arr[np.array(seq)]`, which will result either in an error or a different result. return np.add.reduce(sorted[indexer] * weights, axis=axis) / sumval
Seaborn最大的优点之一在于其种类繁多的绘图功能,下面我们利用lmplot()函数,用一行代码来绘制散点图。我们希望x轴显示Attack数据,y轴显示Defense数据,则可以编写代码。 事实上seaborn并没有专门用来绘制散点图的功能,实际上我们用它来拟合和绘制回归线。 幸运的是,我们可以通过设置函数的参数来得到我们想要的散点图。用fit_reg = False 移去回归线,用hug参数来用不同颜色显示Pokemon进化阶段的信息。 #移去回归线,用不同颜色来表示pokemon的进化阶段,即刻得到散点图: sb.lmplot(x = 'Attack', y = 'Defense', data = df, fit_reg = False, hue = 'Stage')
从散点图可以看出,所有的数据点都分布在数轴的正半轴,然而散点图的数轴从负数开始的,我们可以对它进行改进。 用Matplotlib定制虽然Seaborn是Matplotlib的一个高级接口,但是我们有时候也需要用到Matplotlib。其中包括设置数轴的范围。我们利用Matplotlib的ylim()和xlim()函数来设置数轴的范围。 #设置数轴范围 plt.gca().set(xlim = (0, None), ylim = (0, None), xlabel='Attack', ylabel='Defense') [(0, 1.0), Text(0, 0.5, 'Defense'), (0, 1.0), Text(0.5, 0, 'Attack')]
尽管这是一个Seaborn教程,pandas依然在实际应用中起到了十分重要的作用。下面我们根据Pokemon的攻击数据来绘制箱形图 sb.boxplot(data = df) #得到的箱形图:
很好,这是一个良好的开端,但是我们可以移除不需要的几列数据。 移除掉Total,因为我们有独立的统计数据。 移除掉Stage跟Legendary,因为它们不是攻击统计数据。 我们可以创建一个新的数据集stats_df,满足我们上述的要求。 #创建新数据集 stats_df = df.drop(['Total', 'Stage', 'Legendary'], axis = 1) #Boxplot sb.boxplot(data = stats_df)
得到了一个改进了的箱形图。 Seaborn 主题Seaborn的另一个好处就是其恰到好处、开箱即用的风格主题。其默认的主题为“darkgrid” 下一步,我们把主题改为“whitegrid”来创建一个小提琴图 小提琴图常常作为箱形图的替代 小提琴图通过小提琴的厚度展示了数据的分布,而不仅仅是总结数据。 根据Pokemon的主要类型,我们可以将Attack数据的分布可视化。 #设置主题 sb.set_style('whitegrid') #violin plot sb.violinplot(x = 'Type 1', y = 'Attack', data = df)
可以得到小提琴图,x轴显示的是Pokemon的Type1,y轴显示的是不同Pokemon的攻击数值。 调色盘Seaborn可以根据我们的需求,来设置颜色。我们可以创建一个python命令列表,用颜色的十六进制数值来设置。数值可以在Bulbapedia中寻找。 #创建颜色列表 pkmn_type_colors = ['#78C850', '#F08030', '#6890F0', '#A8B820', '#A8A878', '#A040A0', '#F8D030', '#E0C068', '#EE99AC', '#C03028', '#F85888', '#B8A038', '#705898', '#98D8D8', '#7038F8' ] #导入小提琴图中 sb.violinplot(x = 'Type 1', y = 'Attack', data = df, palette = pkmn_type_colors) D:\Function\Anaconda3\lib\site-packages\scipy\stats\stats.py:1713: FutureWarning: Using a non-tuple sequence for multidimensional indexing is deprecated; use `arr[tuple(seq)]` instead of `arr[seq]`. In the future this will be interpreted as an array index, `arr[np.array(seq)]`, which will result either in an error or a different result. return np.add.reduce(sorted[indexer] * weights, axis=axis) / sumval
为了能够让数据文件中的151个Pokemon都能够在图中简单展示,我们可以用群集图 swarm plot达到这一目的。 sb.swarmplot(x = 'Type 1', y = 'Attack', data = df, palette = pkmn_type_colors)
我们已经绘制出了小提琴图和群集图,Seaborn允许我们将这两张图整合在一张图上,步骤如下: 首先,我们用Matplotlib设置图形比例。 然后,我们绘制小提琴图,用inner = None将小提琴中间的木杆移去。 接着,我们绘制群集图,并将数据点的颜色变为黑色。 最后,我们可以用Matplotlib设置一个标题。 #设置图形比例 plt.figure(figsize = (10, 6)) #创建violinplot sb.violinplot(x = 'Type 1', y = 'Attack', data = df, inner = None, palette = pkmn_type_colors) #创建swarmplot sb.swarmplot(x = 'Type 1', y = 'Attack', data = df, color = 'k', palette = pkmn_type_colors) #设置标题 plt.title('Attack by Type') #其中alpha为透明度。 编译后可以得到如下图形。 Text(0.5, 1.0, 'Attack by Type')
现在我们可以清晰的看到不同Pokemon的攻击值了。那么我们怎么看其他的数值呢? 融合数据为了展现其他的数据,我们当然可以重复以上的步骤,绘制多张图。但是我们同样也可以在一张图上表示所有的数据,这时候pandas就派上用场了。 我们可以利用pandas的melt()函数来将一些数据进行融合,这样就可以在不同Pokemon之间直接进行比对,melt()需要导入3个参数,分别为: 需要融合的数据列表 需要保留的ID变量,其他变量将会被Pandas融合。 融合而成的新变量的名字。 #数据融合 melted_df = pd.melt(stats_df, id_vars = ['Name', 'Type 1', 'Type 2'], var_name = 'Stat') #前五行 melted_df.head() Name Type 1 Type 2 Stat value 0 Bulbasaur Grass Poison # 1 1 Ivysaur Grass Poison # 2 2 Venusaur Grass Poison # 3 3 Charmander Fire NaN # 4 4 Charmeleon Fire NaN # 5我们为已经融合的数据列表melted_df绘制群集图。 #数据融合 melted_df = pd.melt(stats_df, id_vars = ['Name', 'Type 1', 'Type 2'], var_name = 'Stat') #前五行 melted_df.head() #绘制群集图 sb.swarmplot(x = 'Stat', y = 'value', data = melted_df, hue = 'Type 1') #就可以得到如下的群集图。x轴为Stat中融合的六个变量,y轴为Stat的值,不同颜色代表不同的Pokemon Type 1。
这张图表有一些细节需要完善: 扩大图表。 使用split = True 来分隔色调。 使用我们自定义的颜色。 调整y轴的范围 将图例放在右侧。 #扩大图表 plt.figure(figsize = (10, 8)) #绘制群集图,使用split = True 来分割,使用自定义的颜色 sb.swarmplot(x = 'Stat', y = 'value', data = melted_df, hue = "Type 1", split = True, palette = pkmn_type_colors) #调整Y轴的范围 plt.ylim(0,260) #将图例放在右侧 plt.legend(bbox_to_anchor = (1,1), loc = 2) D:\Function\Anaconda3\lib\site-packages\seaborn\categorical.py:2974: UserWarning: The `split` parameter has been renamed to `dodge`. warnings.warn(msg, UserWarning)
即可得到一个已经细节完善后的图表。 迷你画廊 HeatmapHeatmap可以帮助可视化矩阵状的数据。 #计算相关性 corr = stats_df.corr() #Hteatmap sb.heatmap(corr)
Histogram能够绘制变量的数值分布。 #绘制直方图 sb.distplot(df.Attack)
条形图可以帮助分类变量的可视化。 #绘制条形图abs sb.countplot(x = 'Type 1', data = df, palette = pkmn_type_colors) #倾斜x轴的标签 plt.xticks(rotation = -45) (array([ 0, 1, 2, 3, 4, 5, 6, 7, 8, 9, 10, 11, 12, 13, 14]), )
Factor plots能够根据类别分离图表。 #分离图表 g = sb.factorplot(x = 'Type 1', y = 'Attack', data = df, hue = 'Stage', #用不同的颜色表示Stage col = 'Stage', #根据Stage来分离图表 kind = 'swarm', #创建群集图 ) #倾斜x轴的标签 plt.xticks(rotation = -45) D:\Function\Anaconda3\lib\site-packages\seaborn\categorical.py:3666: UserWarning: The `factorplot` function has been renamed to `catplot`. The original name will be removed in a future release. Please update your code. Note that the default `kind` in `factorplot` (`'point'`) has changed `'strip'` in `catplot`. warnings.warn(msg) (array([ 0, 1, 2, 3, 4, 5, 6, 7, 8, 9, 10, 11, 12, 13, 14]), )
可以得到根据Stage分离的三个图表,分别用不同颜色的点表示不同的Pokemon。 Density Plot密度图显示的是两个变量之间的分布。 曲线越密集的地方说明两个变量的关系越近,越稀疏的地方说明关系越远。 #创建密度图 sb.kdeplot(df.Attack, df.Defense) D:\Function\Anaconda3\lib\site-packages\scipy\stats\stats.py:1713: FutureWarning: Using a non-tuple sequence for multidimensional indexing is deprecated; use `arr[tuple(seq)]` instead of `arr[seq]`. In the future this will be interpreted as an array index, `arr[np.array(seq)]`, which will result either in an error or a different result. return np.add.reduce(sorted[indexer] * weights, axis=axis) / sumval
联合分布图将散点图和直方图的信息结合起来,提供双变量分布的详细信息。 #创建联合分布图 sb.jointplot(x = 'Attack', y = 'Defense', data = df)
这里只是介绍了Seaborn常用的绘图功能,还有更强大的功能Example gallery需要我们去学习,去探索。 |
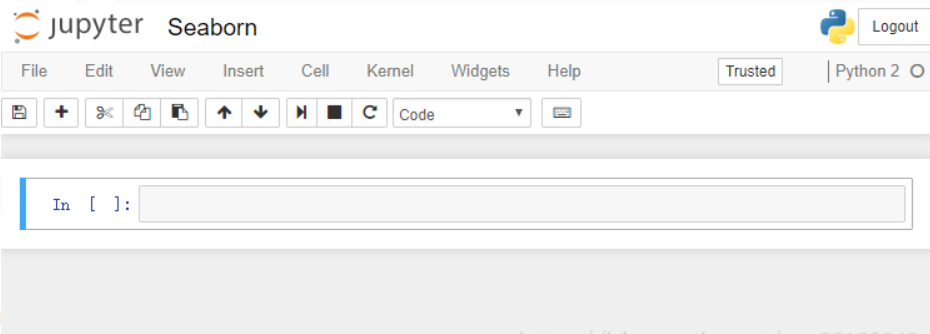 点击右侧的New,新建一个Notebook,弹出一个新的网页窗口,点击上方可命名文件。


【本文地址】