| ubuntu16.04最小根文件系统制作及集成安装ros | 您所在的位置:网站首页 › Ubuntubase和viv › ubuntu16.04最小根文件系统制作及集成安装ros |
ubuntu16.04最小根文件系统制作及集成安装ros
|
创建 Ubuntu 根文件系统
准备工作
安装qemu
在Linux PC主机上安装模拟器: sudo apt-get install qemu-user-static 下载和解压 ubuntu-coreFirefly-rk3399 ubuntu根文件系统是基于Ubuntu base 16.04来创建的。用户可以到ubuntu cdimg 下载,选择下载ubuntu-base-16.04.1-base-arm64.tar.gz 。 下载完之后,创建临时文件夹并解压根文件系统: mkdir ubuntu sudo tar -xpf ubuntu-base-16.04.1-base-arm64.tar.gz -C temp 修改根文件系统 准备工作准备网络: sudo cp -b /etc/resolv.conf ubuntu/etc/resolv.conf准备qemu sudo cp /usr/bin/qemu-aarch64-static ubuntu/usr/bin/进入根文件系统进行操作: sudo chroot ubuntu 更新及安装更新: apt update apt upgrade安装自己需要的功能 apt install vim git ....(根据自己需求添加)可能出现错误: E: Unable to locate package xxxx安装包的源没有添加到/etc/apt/source.list中,导致无法识别安装包,可以自行添加源,也可以使用下面给出的source.list覆盖原来的/etc/apt/source.list文件: # See http://help.ubuntu.com/community/UpgradeNotes for how to upgrade to # newer versions of the distribution. deb http://ports.ubuntu.com/ubuntu-ports/ xenial main restricted deb-src http://ports.ubuntu.com/ubuntu-ports/ xenial main restricted ## Major bug fix updates produced after the final release of the ## distribution. deb http://ports.ubuntu.com/ubuntu-ports/ xenial-updates main restricted deb-src http://ports.ubuntu.com/ubuntu-ports/ xenial-updates main restricted ## Uncomment the following two lines to add software from the 'universe' ## repository. ## N.B. software from this repository is ENTIRELY UNSUPPORTED by the Ubuntu ## team. Also, please note that software in universe WILL NOT receive any ## review or updates from the Ubuntu security team. deb http://ports.ubuntu.com/ubuntu-ports/ xenial universe deb-src http://ports.ubuntu.com/ubuntu-ports/ xenial universe deb http://ports.ubuntu.com/ubuntu-ports/ xenial-updates universe deb-src http://ports.ubuntu.com/ubuntu-ports/ xenial-updates universe ## N.B. software from this repository may not have been tested as ## extensively as that contained in the main release, although it includes ## newer versions of some applications which may provide useful features. ## Also, please note that software in backports WILL NOT receive any review ## or updates from the Ubuntu security team. deb http://ports.ubuntu.com/ubuntu-ports/ xenial-backports main restricted deb-src http://ports.ubuntu.com/ubuntu-ports/ xenial-backports main restricted deb http://ports.ubuntu.com/ubuntu-ports/ xenial-security main restricted deb-src http://ports.ubuntu.com/ubuntu-ports/ xenial-security main restricted deb http://ports.ubuntu.com/ubuntu-ports/ xenial-security universe deb-src http://ports.ubuntu.com/ubuntu-ports/ xenial-security universe deb http://ports.ubuntu.com/ubuntu-ports/ xenial-security multiverse deb-src http://ports.ubuntu.com/ubuntu-ports/ xenial-security multiverse 添加用户及设置密码添加用户 useradd -s '/bin/bash' -m -G adm,sudo firefly给用户设置密码: passwd firefly给root用户设置密码: passwd root 设置可使用root用户登录ssh安装ssh后,默认情况下不允许使用root用户登录,需作以下修改: root@chry-PC:/# vi /etc/ssh/sshd_config
找到PermitRootLogin prohibit-password,改成PermitRootLogin yes。 设置串口因为暂时未安装桌面,所以这里的配置要具体和内核中登录的串口的设备对应起来,不然对导致无法通过串口登录的问题。具体可能会因为目标板差异而不同,具体要参考所使用的平台进行修改。 我的目标开发板为rk3288,它的登录串口为ttyFIQ0, vi /lib/systemd/system/serial-getty\@.service
修改BindsTo选项: dev-%i.device 改成 dev-%i 如果不执行这一步,烧录文件系统后启动,串口可能会卡死。 或另行参考链接(未验证):https://blog.csdn.net/u010632165/article/details/78424000 串口自动登录root用户(可选)修改ExecStart选项: -/sbin/agetty --keep-baud 115200,38400,9600 %I $TERM 改成 -/sbin/agetty -a root --keep-baud 115200,38400,9600 %I $TERM 允许root用户登录串口(可选) vi /etc/pam.d/login
搜索pam_securetty.so,找到改行在前面加#号注释掉:#auth [success=ok new_authtok_reqd=ok ignore=ignore user_unknown=bad default=die] pam_securetty.so 设置主机名(可选)默认主机名为localhost.localdomain root@mynt-xmi:/# echo 'mynt-xmi' > /etc/hostname添加主机入口 root@mynt-xmi:/# vi /etc/hosts 127.0.0.1 localhost 127.0.0.1 mynt-xmi #要保证这个名字与 /etc/hostname中的主机名一致才有效如果不修改/etc/hosts,该系统每次运行sudo命令都会有错误提示,但不影响使用。 错误:sudo时出现unable to resolve host ubuntu添加自动补全功能ubuntu tab键不能自动补全命令的参数 /etc/bash.bashrc 里面有这几行语句 #enable bash completion in interactive shells # if ! shopt -oq posix; then # if [ -f /usr/share/bash-completion/bash_completion ]; then # . /usr/share/bash-completion/bash_completion # elif [ -f /etc/bash_completion ]; then # . /etc/bash_completion # fi # fi 去掉注释 #enable bash completion in interactive shells if ! shopt -oq posix; then if [ -f /usr/share/bash-completion/bash_completion ]; then . /usr/share/bash-completion/bash_completion elif [ -f /etc/bash_completion ]; then . /etc/bash_completion fi fi. /etc/bash.bashrc就ok了,this not enough,so do next 1、安装bash-completion sudo apt-get install bash-completion 2、编辑~/.bashrc 文件 添加如下内容: if [ -f /etc/bash_completion ]; then . /etc/bash_completion fi 3、使其立即生效 source ~/.bashrcperfect!
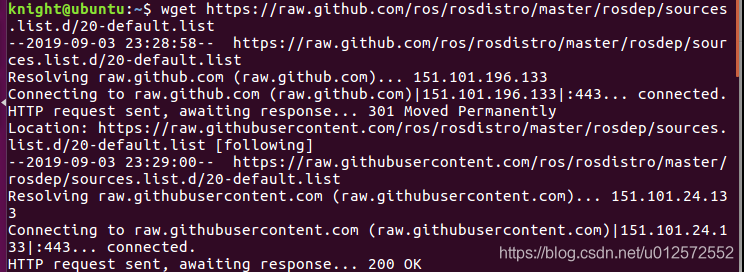
修改完自己的根文件系统就可以退出了。 exit 安装ros-kinetic-ros-base(sources.list建议写入上面的官方源,不然容易出问题)进入根文件系统 sudo chroot ubuntu 设置etc/apt/sources.list.d/ros-latest.list sh -c 'echo "deb http://packages.ros.org/ros/ubuntu $(lsb_release -sc) main" > /etc/apt/sources.list.d/ros-latest.list'但会失败,不如直接写 deb http://packages.ros.org/ros/ubuntu xenial main设置key apt-key adv --keyserver 'hkp://keyserver.ubuntu.com:80' --recv-key C1CF6E31E6BADE8868B172B4F42ED6FBAB17C654更新package apt-get update安装ros-kinetic-ros-base apt-get install ros-kinetic-ros-base可能会出现如下错误 root@mynt-xmi:/# apt-get install ros-kinetic-ros-base Reading package lists... Done Building dependency tree Reading state information... Done Some packages could not be installed. This may mean that you have requested an impossible situation or if you are using the unstable distribution that some required packages have not yet been created or been moved out of Incoming. The following information may help to resolve the situation: The following packages have unmet dependencies: ros-kinetic-ros-base : Depends: ros-kinetic-actionlib but it is not going to be installed Depends: ros-kinetic-bond-core but it is not going to be installed Depends: ros-kinetic-class-loader but it is not going to be installed Depends: ros-kinetic-dynamic-reconfigure but it is not going to be installed Depends: ros-kinetic-nodelet-core but it is not going to be installed Depends: ros-kinetic-pluginlib but it is not going to be installed Depends: ros-kinetic-ros-core but it is not going to be installed E: Unable to correct problems, you have held broken packages.这种是属于sources.list源问题,无法找到部分依赖,不建议使用国内源,虽然安装软件快,但是可能有残缺或者无法连接的源存在,用上述官方源。出现问题建议重新配置源和修复,必须保证apt-get update不出现无法定位或者链接错误的error。检查网络问题等。 apt-get clean apt-get update apt-get upgrade apt-get install -f再次安装ros-kinetic-ros-base 安装完毕后初始化rosdep 注意:在使用ROS之前需要初始化rosdep rosdep init这个时候可能就会出错 错误1: 64位系统下:Some packages could not be installed. 错误 在很多64位机器上如果安装 ros-kinetic-desktop-full 会出现如下错误: Reading package lists... Done Building dependency tree Reading state information... Done Some packages could not be installed. This may mean that you have requested an impossible situation or if you are using the unstable distribution that some required packages have not yet been created or been moved out of Incoming. The following information may help to resolve the situation: The following packages have unmet dependencies: ros-kinetic-desktop-full : Depends: ros-kinetic-desktop but it is not going to be installed Depends: ros-kinetic-simulators but it is not going to be installed E: Unable to correct problems, you have held broken packages. 解决这一问题的方法一个是只安装核心库 ros-kinetic-desktop 或者可以尝试先卸载下面的组件: apt-get remove gazebo-* sdformat-*错误2: default sources list file already exists 在运行 rosdep init 时可能出现如下错误: ERROR: default sources list file already exists: /etc/ros/rosdep/sources.list.d/20-default.list Please delete if you wish to re-initialize 通常这是因为你之前曾经安装过 ROS 系统的某个版本,只需按照提示删除已经存在的初始化文件即可: rm /etc/ros/rosdep/sources.list.d/20-default.list 然后再重新运行 rosdep init 就没有问题了。错误3:也是我遇到的错误 ERROR: cannot download default sources list from: https://raw.githubusercontent.com/ros/rosdistro/master/rosdep/sources.list.d/20-default.list Website may be down.修复办法简单粗暴直接创建etc/ros/rosdep/sources.list.d/20-default.list这个文件,进入这个文件目录 wget https://raw.github.com/ros/rosdistro/master/rosdep/sources.list.d/20-default.list
或者这样解决 #打开hosts文件 sudo gedit /etc/hosts #在文件末尾添加 151.101.84.133 raw.githubusercontent.com #保存后退出再尝试继续初始化rosdep注意:之前都是root用户所以没有加sudo,之前的ros安装命令都是需要root权限的,但rosdep update 必须在普通用户下执行,目前的系统不支持sudo,需要在root用户下apt-get install sudo su mynt rosdep update不顺利的话又会出错如果是错误码110就是网络问题,自己想办法解决网络问题 如果错误码是111,访问被拒绝有可能是域名服务器问题推荐使用 解决方法: sudo vim /etc/resolv.conf 改成下面两句: nameserver 8.8.8.8 #google域名服务器 nameserver 8.8.4.4 #google域名服务器多试几次,我的后来就成功了 配置ROS环境 echo "source /opt/ros/kinetic/setup.bash" >> ~/.bashrc source ~/.bashrc 安装依赖项 sudo apt-get install python-rosinstall python-rosinstall-generator python-wstool build-essential 测试ROS是否安装成功 roscore报错 解决方法 以上问题是由于ROS环境变量ROS_MASTER_URI设置错误导致的,重新设置该变量即可。 打开~/.bashrc文件,添加或修改环境变量ROS_HOSTNAME和ROS_MASTER,即改为: export ROS_HOSTNAME=localhost export ROS_MASTER_URI=http://localhost:11311修改并保存~/.bashrc文件后,再重新启动下该文件source ~/.bashrc,再运行roscore即可正常运行 至此ros已安装完毕,退出文件系统exit 制作根文件系统制作自己的根文件系统,大小依据自己的根文件系统而定,注意依据temp文件夹的大小来修改count值 mkdir rootfs dd if=/dev/zero of=linuxroot.img bs=1M count=4000 mkfs.ext4 linuxroot.img sudo mount linuxroot.img rootfs/ sudo cp -rfp temp/* rootfs/ sudo umount rootfs/ e2fsck -p -f linuxroot.img resize2fs -M linuxroot.img这样 linuxroot.img 就是最终的根文件系统映像文件了。 FAQs 根文件系统加载后,大小不正常,未占满整个分区:在系统正确加载后执行扩展文件系统命令: resize2fs /dev/mmcblk1p6 --> rootfs 分区 查看 parameter文件中,root= 节点设备
|

【本文地址】